

Scrappy Spiral Stocking Tutorial
We're resharing an older tutorial that is popular every year around the holidays ...
Introducing the Scrappy Spiral Stocking ...

Materials Needed:
1 FQ worth of scraps for front and hanging loop
1 FQ for the back
1 yard for the lining
Fusible Interfacing
Batting
Stocking Pattern
Basic Sewing Supplies
I made a Christmas stocking template and you are welcome to download it here. Also, feel free to make your stocking taller or wider by extending the pattern or trace a favorite stocking and add a seam allowance.
I used fabrics from my stash for this project, but we have a fun selection of Christmas prints here.
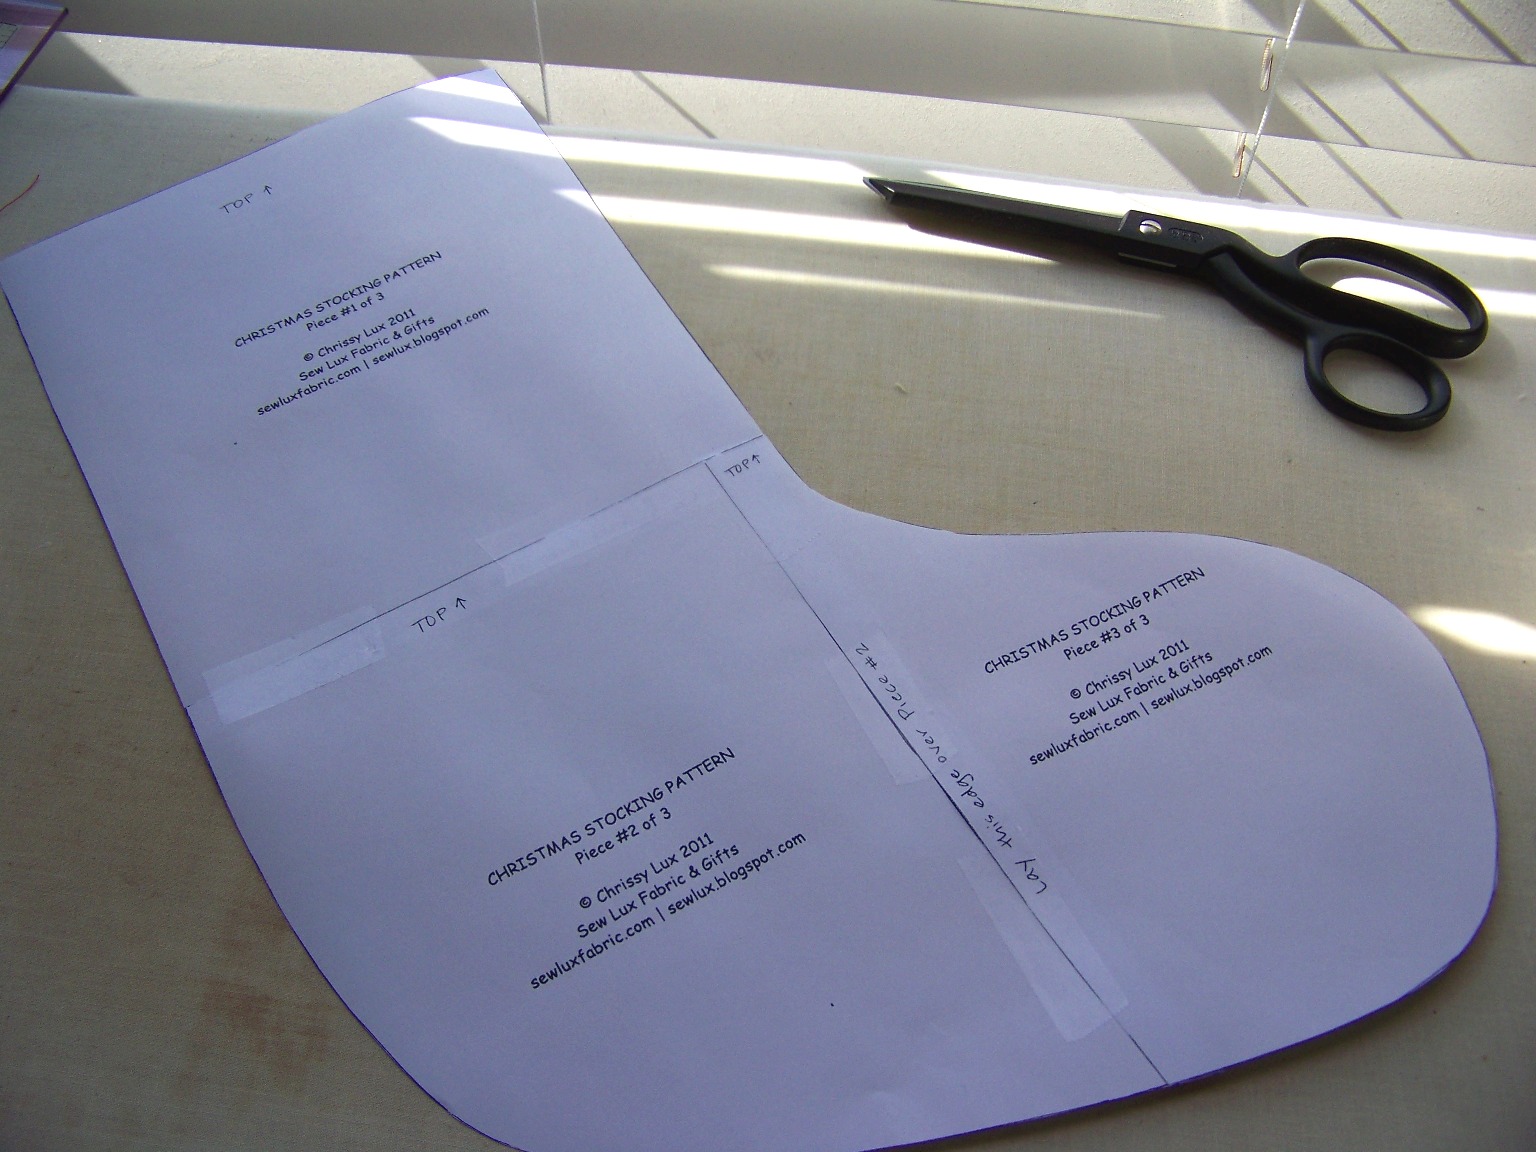
Step One: Prepare your template. Print the pattern (see link above). Be sure to set your printer scaling setting to "none."
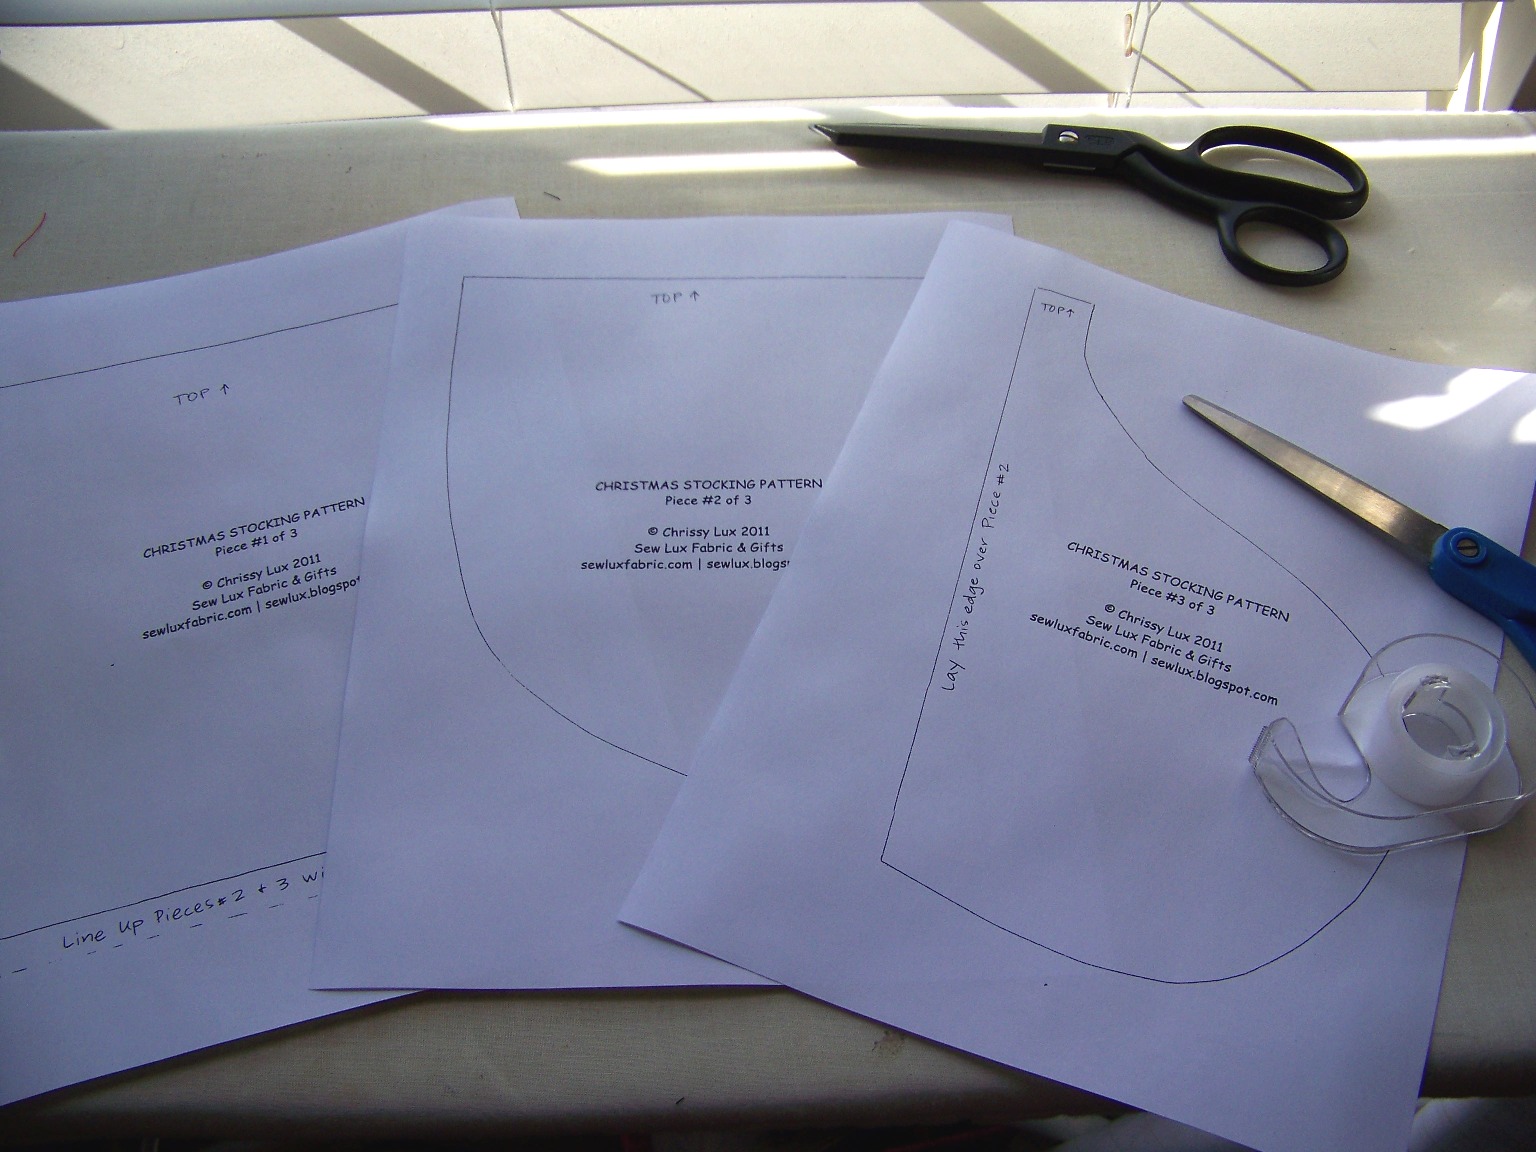
Cut out your pieces.
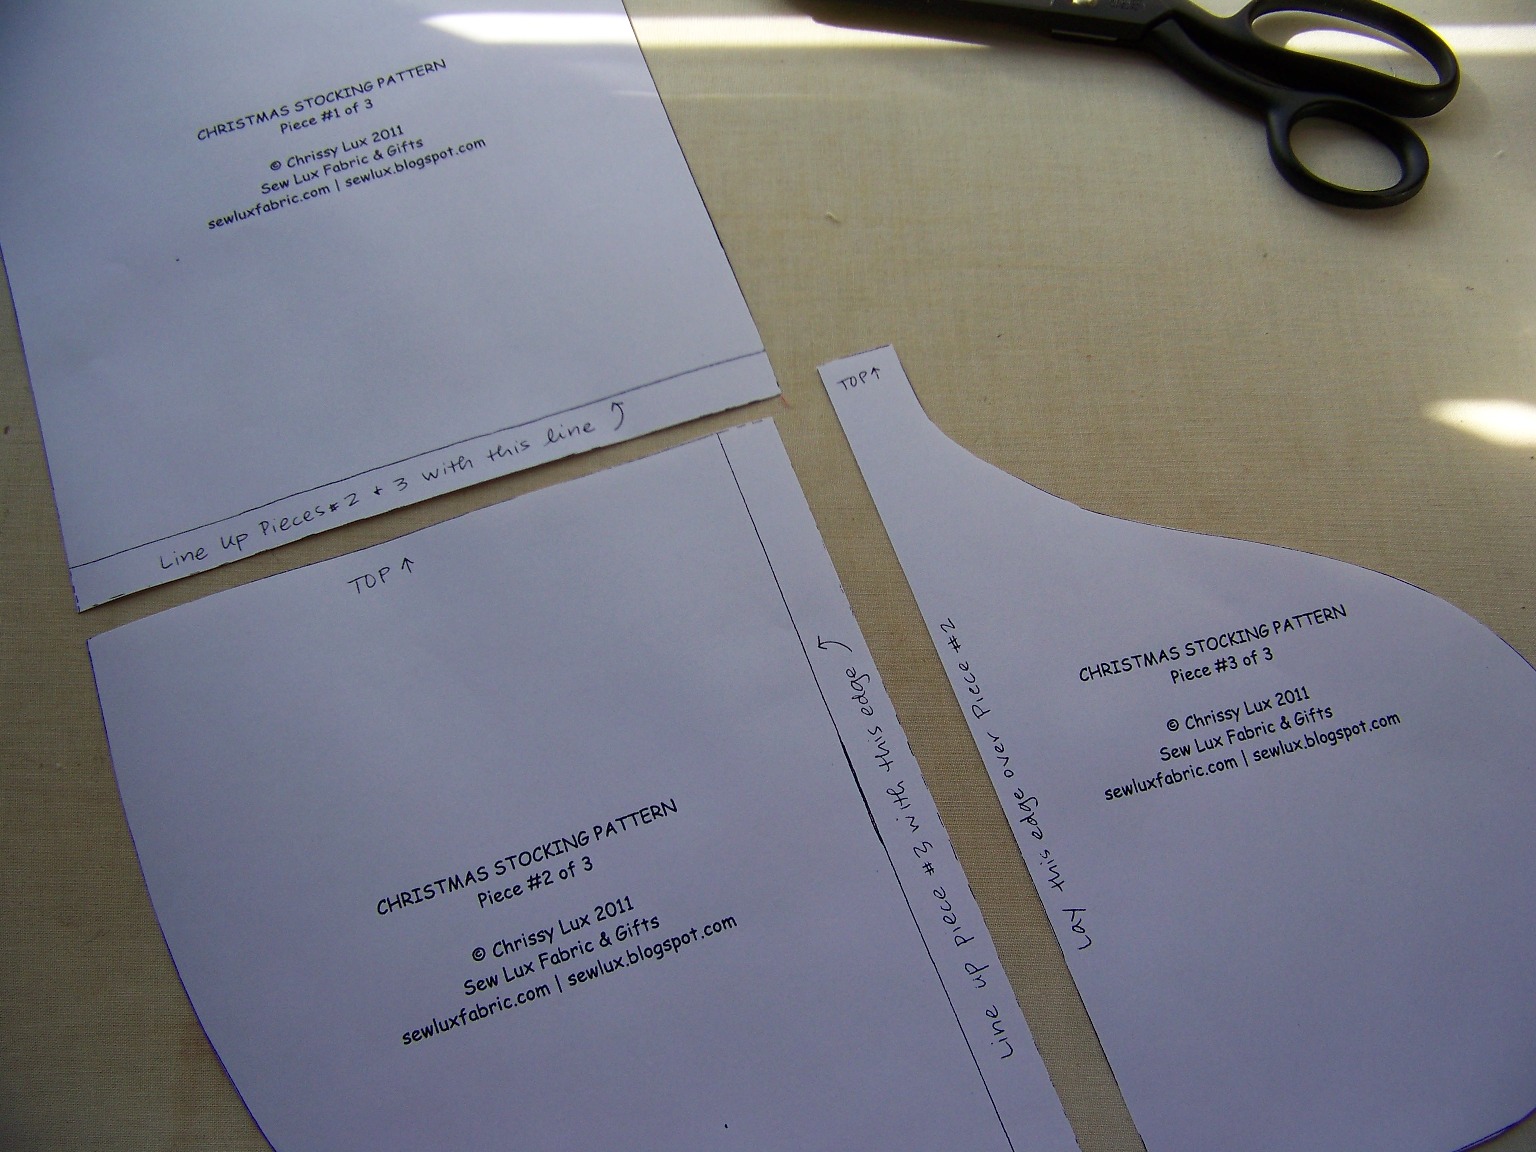
Tape or glue them together to create your stocking template.
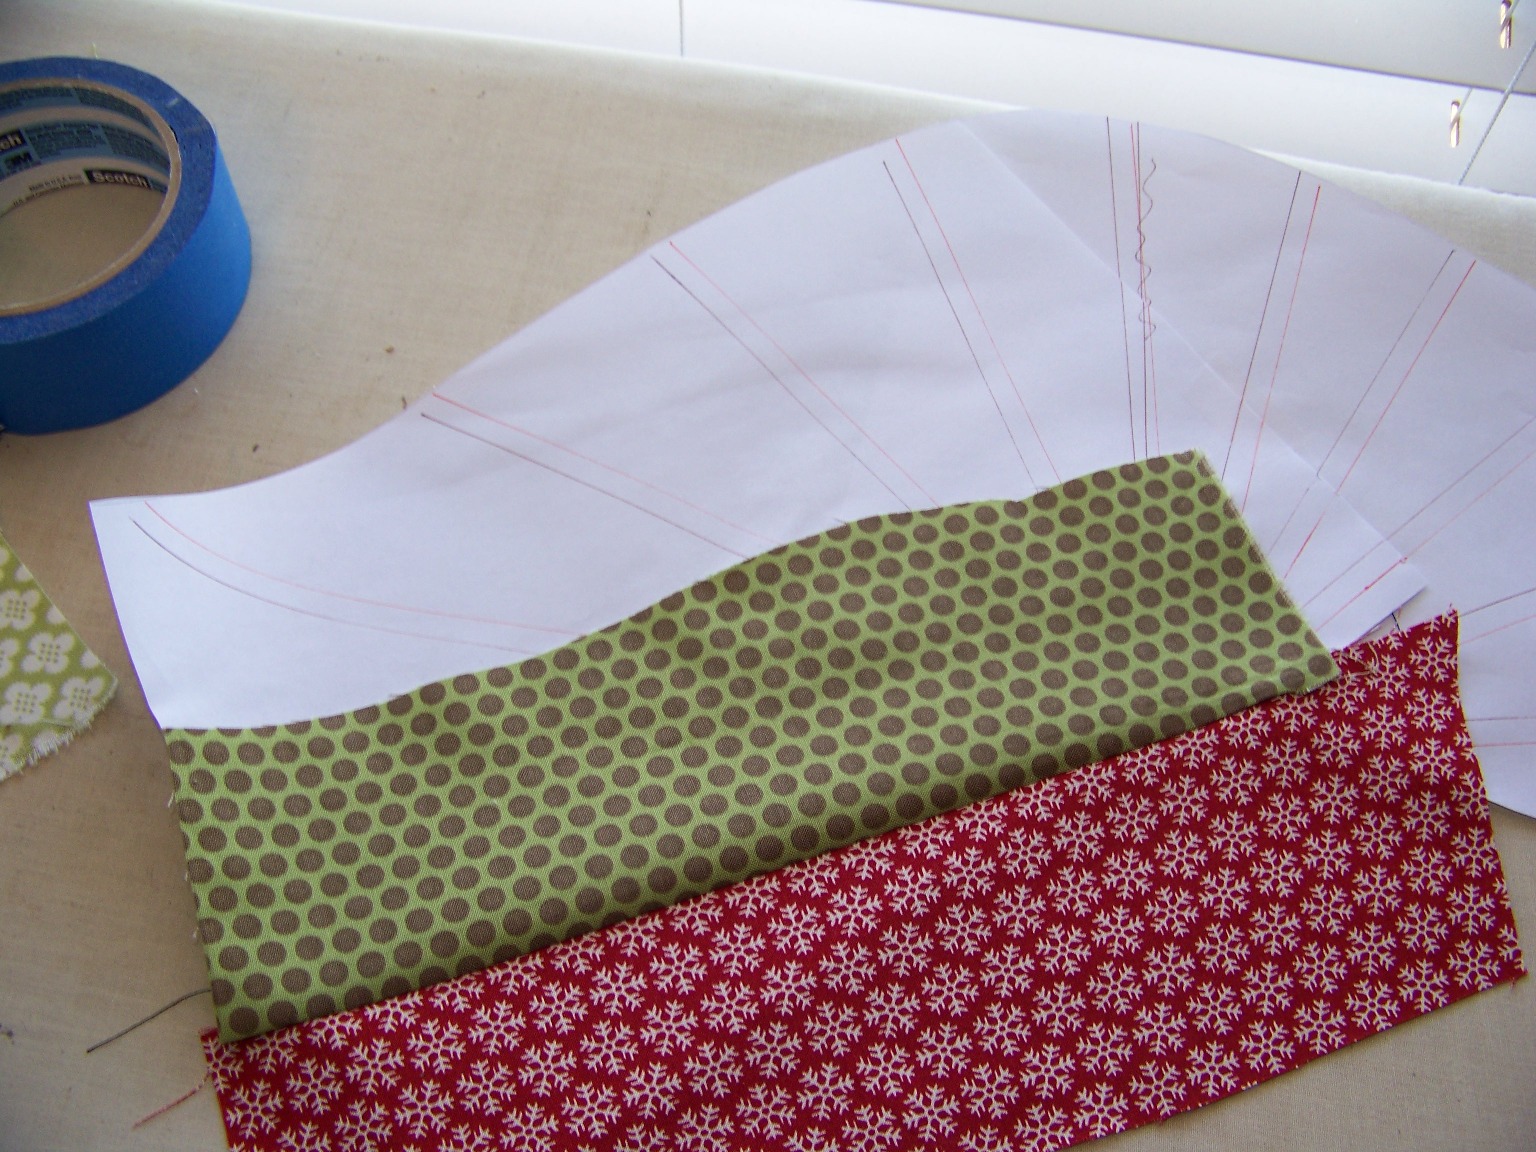
Step Two: Draw your spiral pattern. Using a ruler, draw lines spiraling out from the curve of the stocking. Be sure you are drawing on the FRONT side of your pattern - whichever direction you want your stocking to face. The stocking I am making will face left. If you want your stocking to face right, flip the pattern and draw your lines.
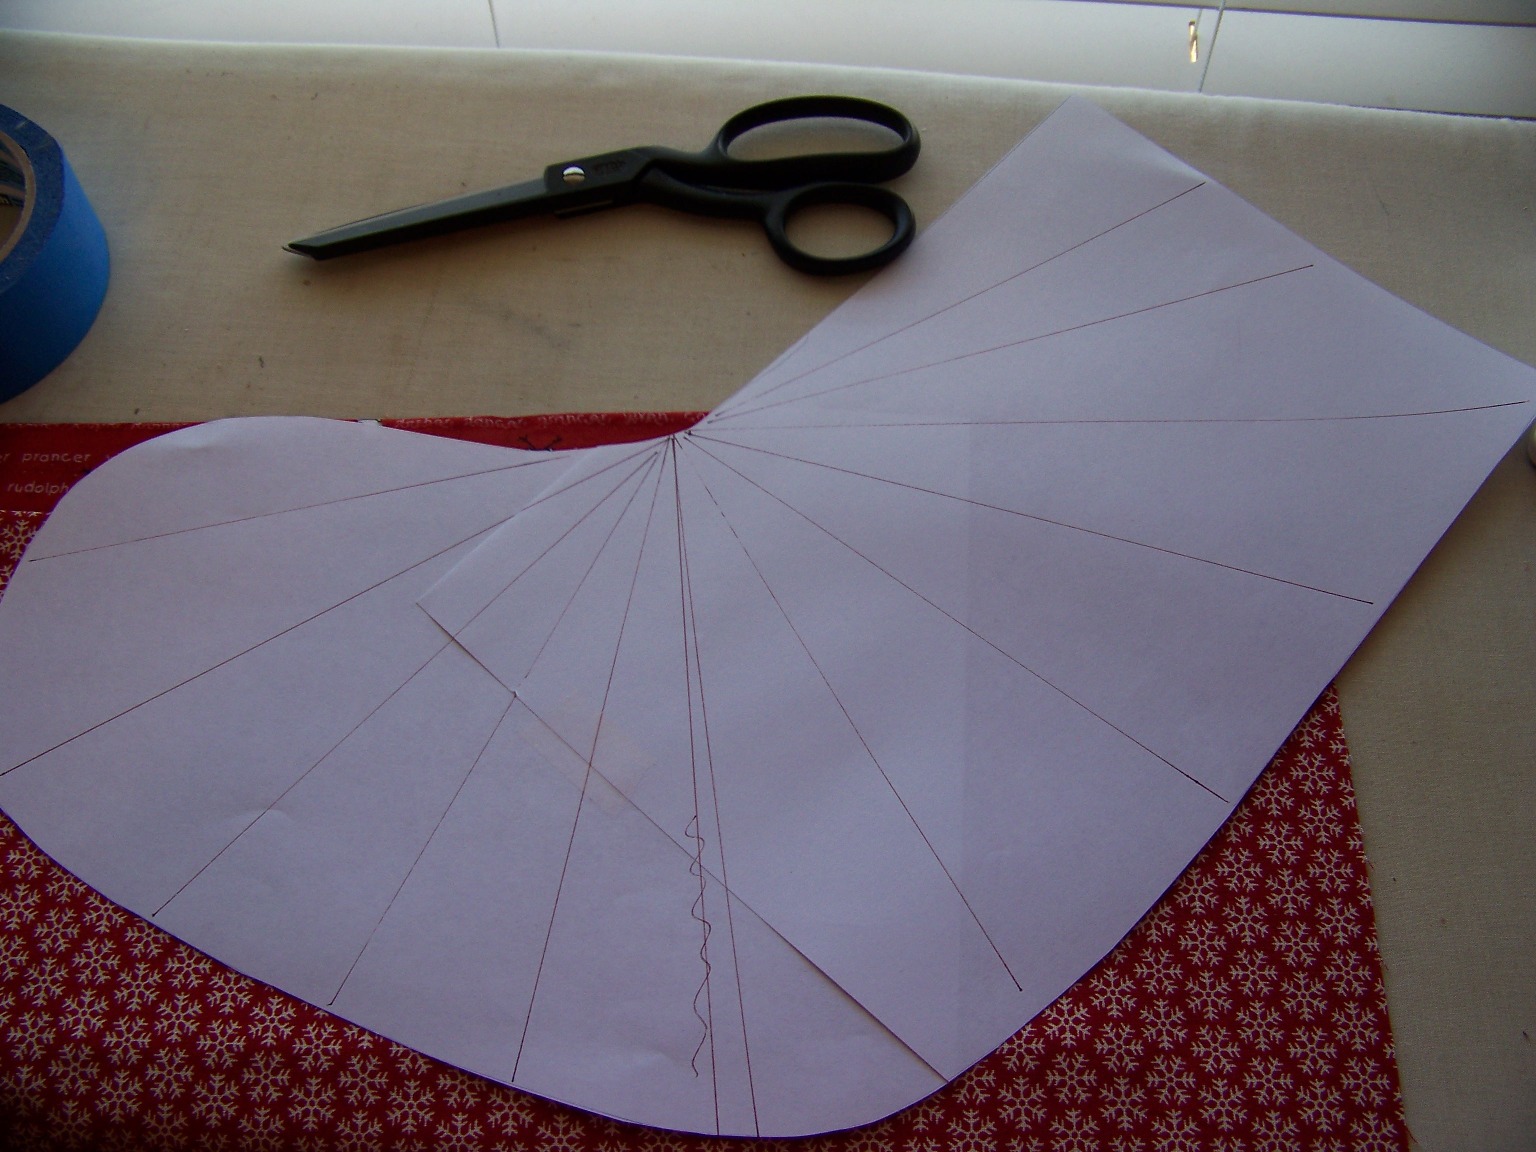
Go back and draw lines 1/4 inch apart from the original lines you drew. These lines (shown in orange) will be where you line up your fabric edges and will be used for trimming. Your original lines (shown in black) are stitching lines. (Hope this makes sense!)

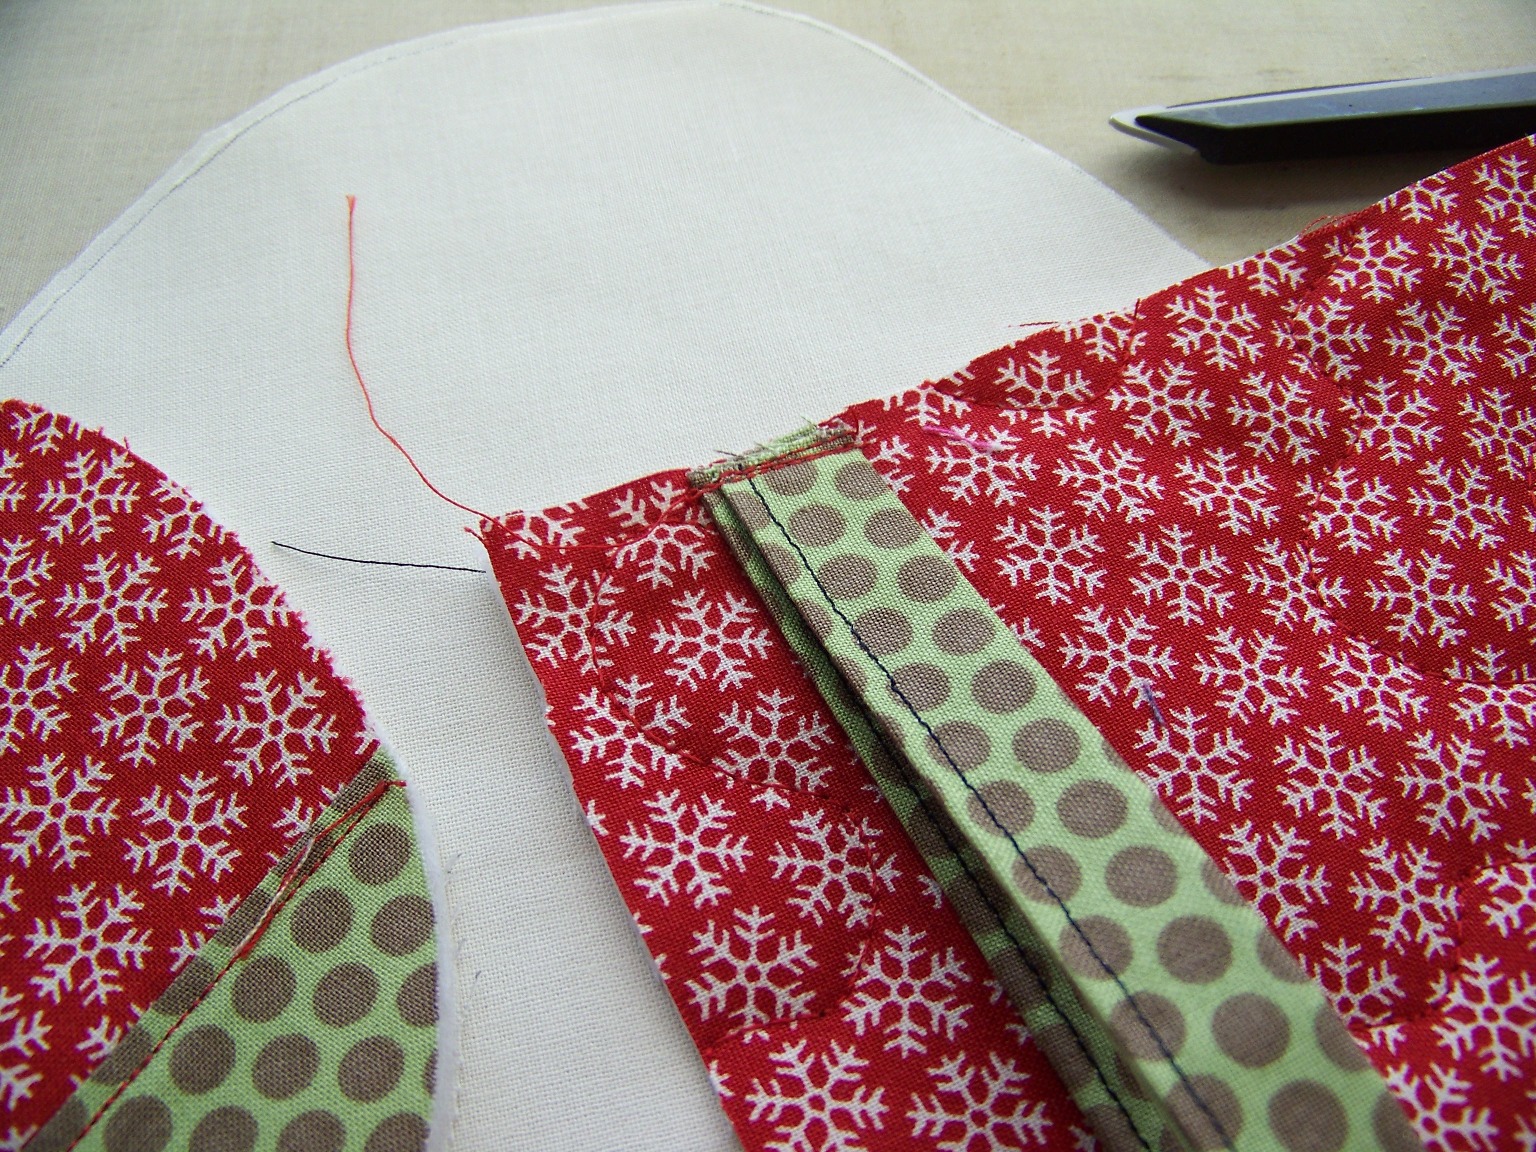
Step Three: Piece the front of your stocking. Place two strips of fabric right sides together (RST) and line up with the first orange line. Stitch down using a 1/4" inseam. Shorten your stitch length so it will be easier to remove the paper later. :-)

Press the seam.
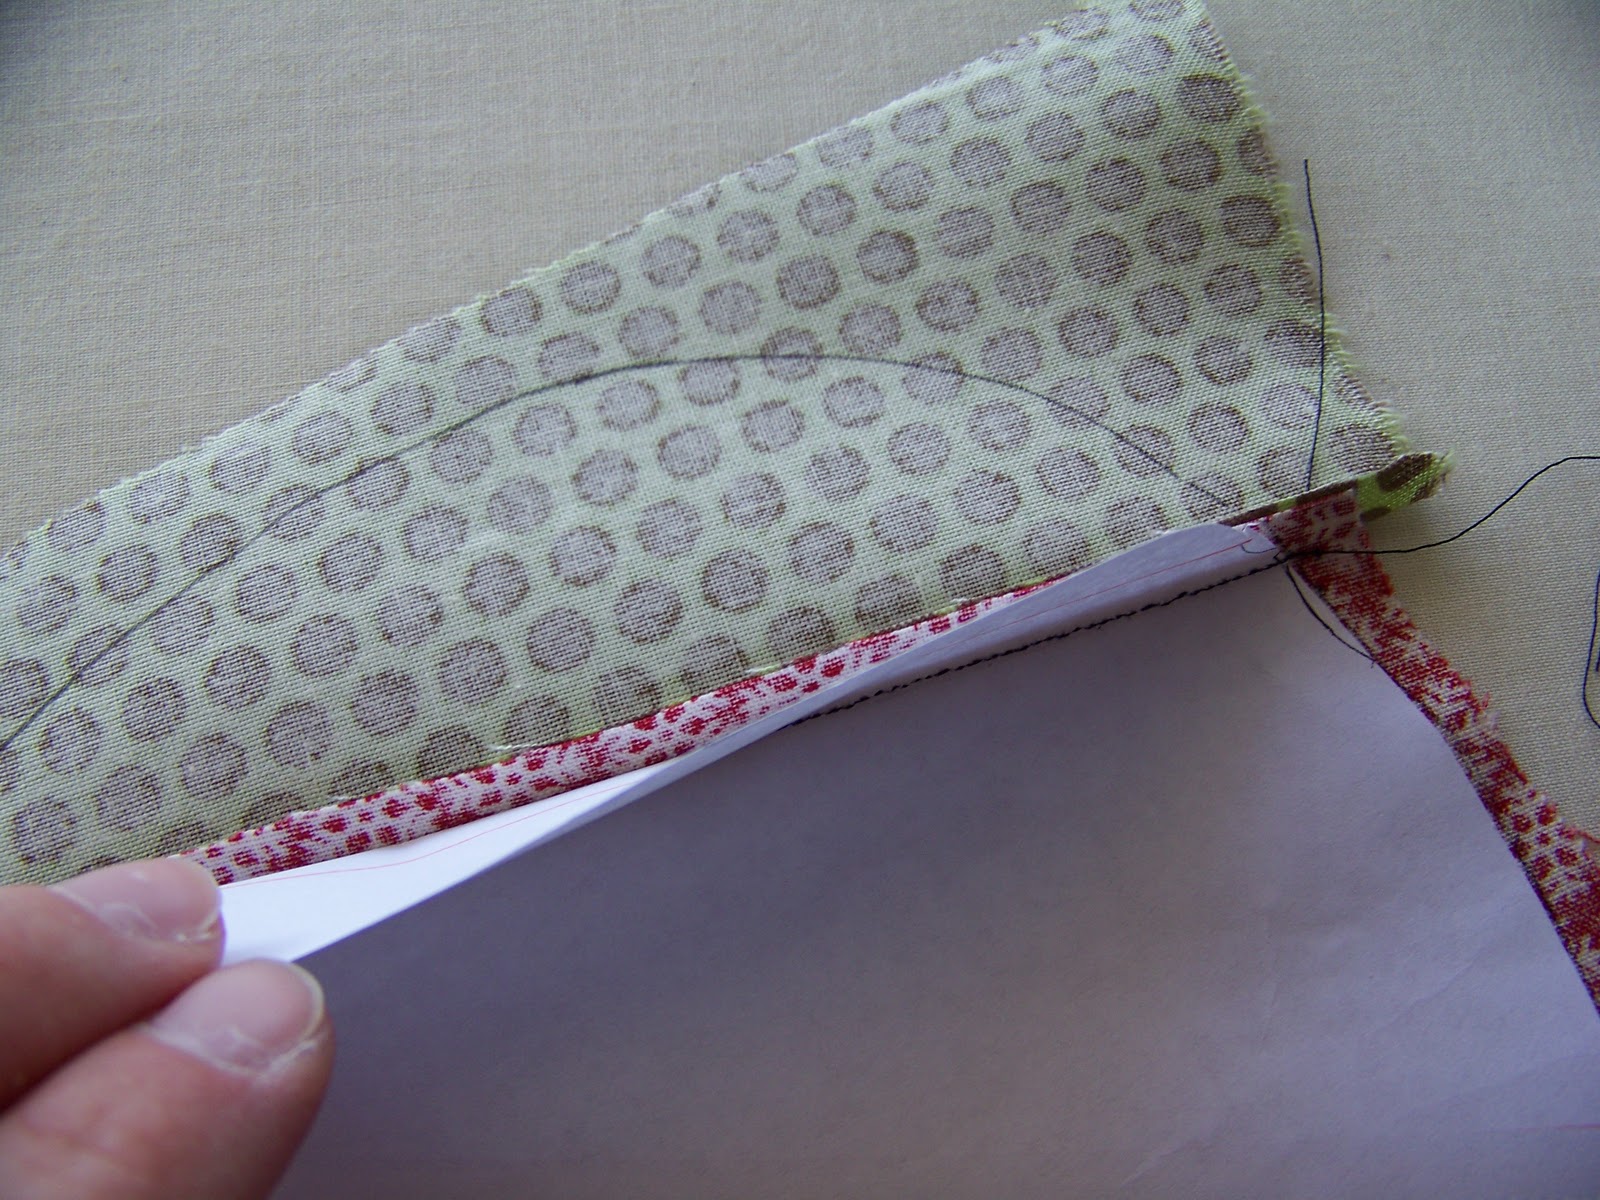
Fold the paper on the next orange line. The lay the piece fabric face down on a cutting mat with the paper folded back and trim along the edge of the fold.
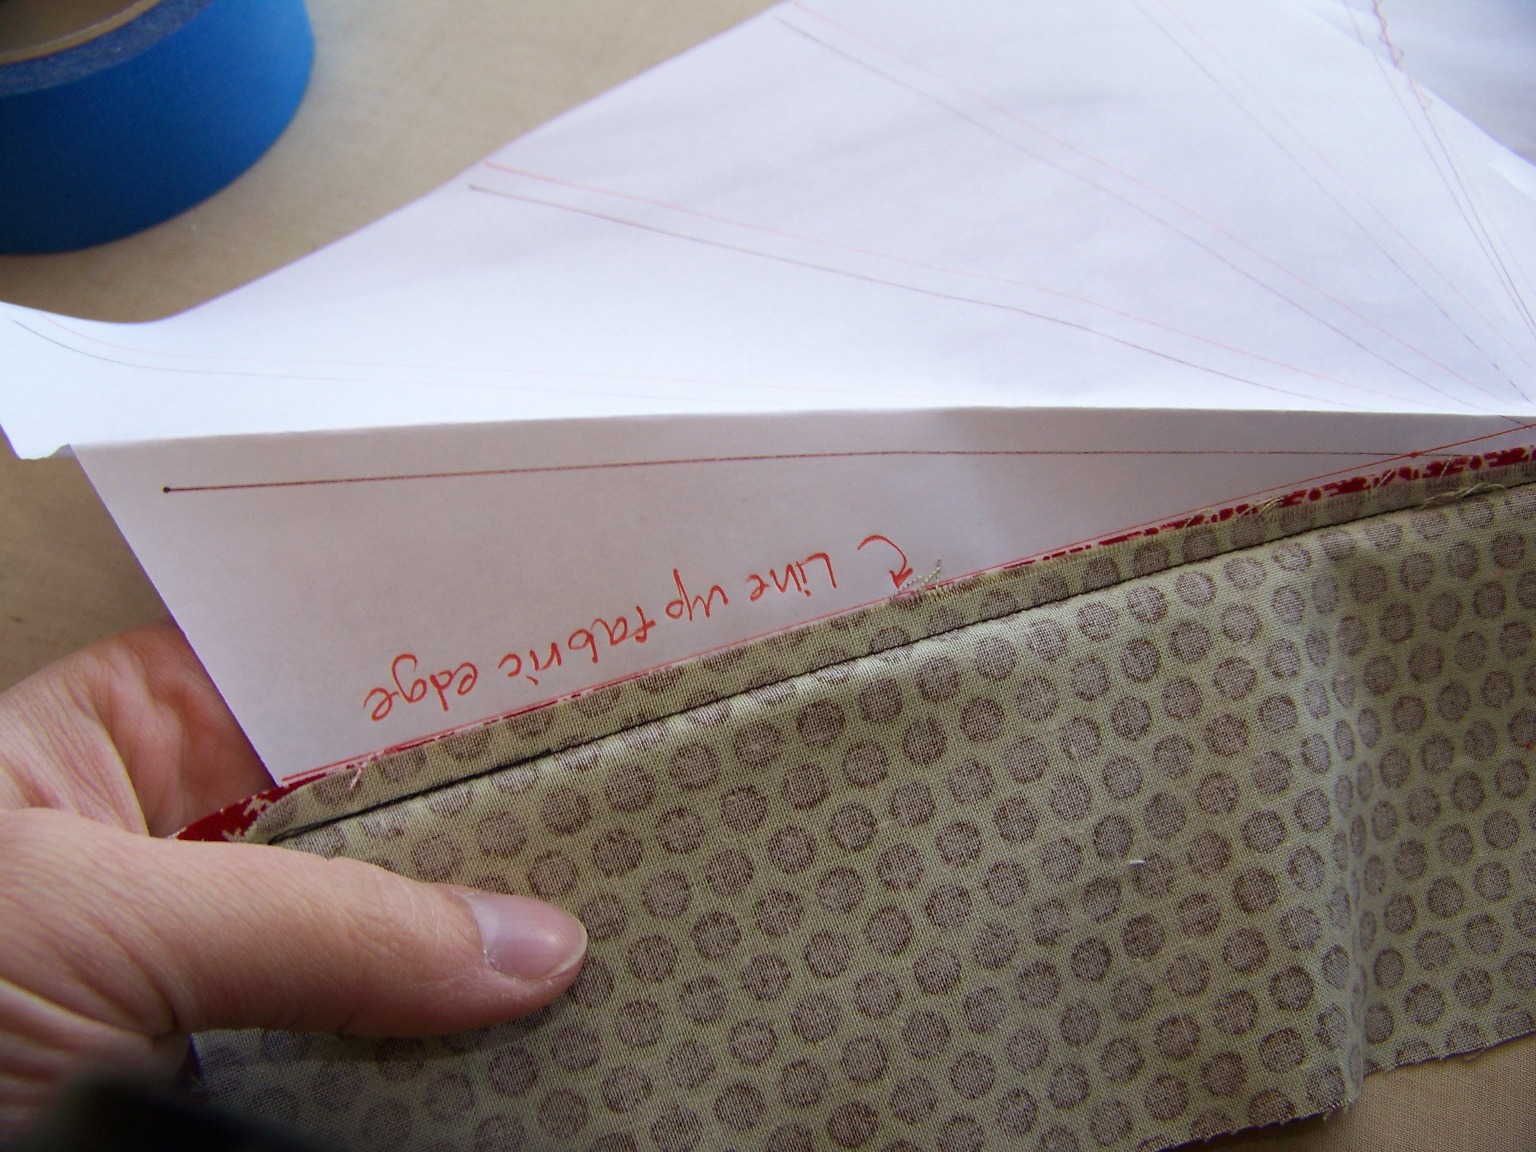
After trimming the fabric, it should look like this ...
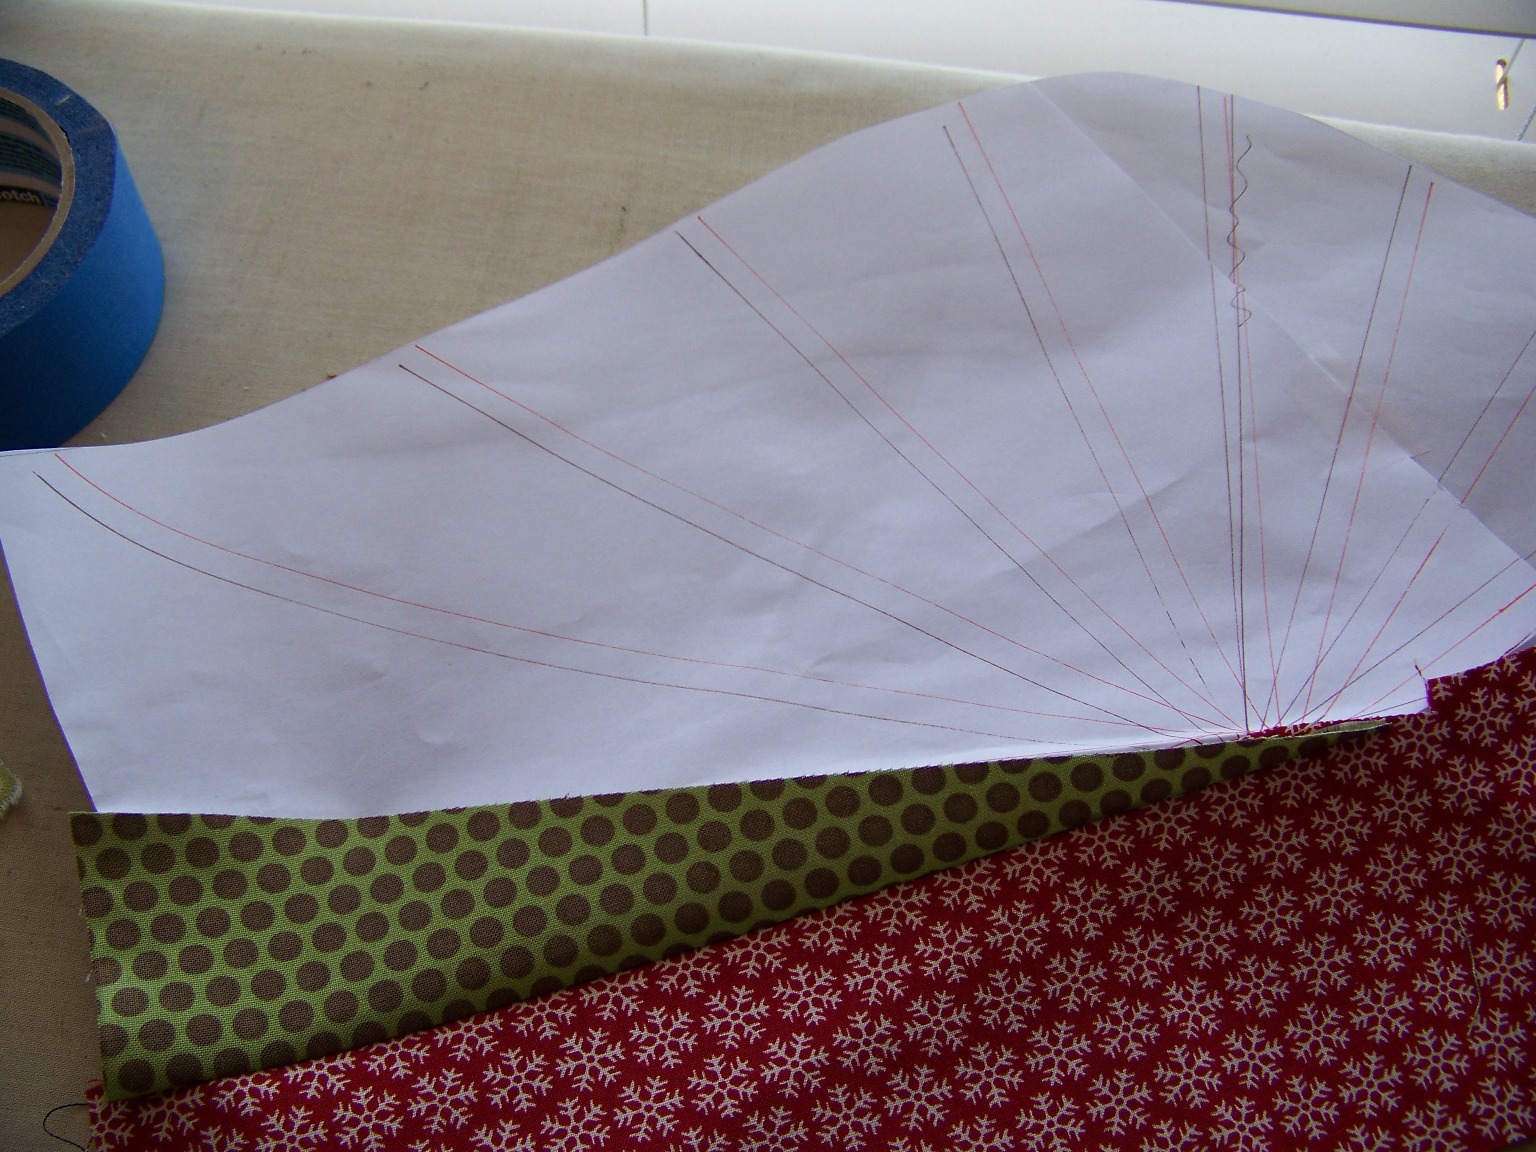
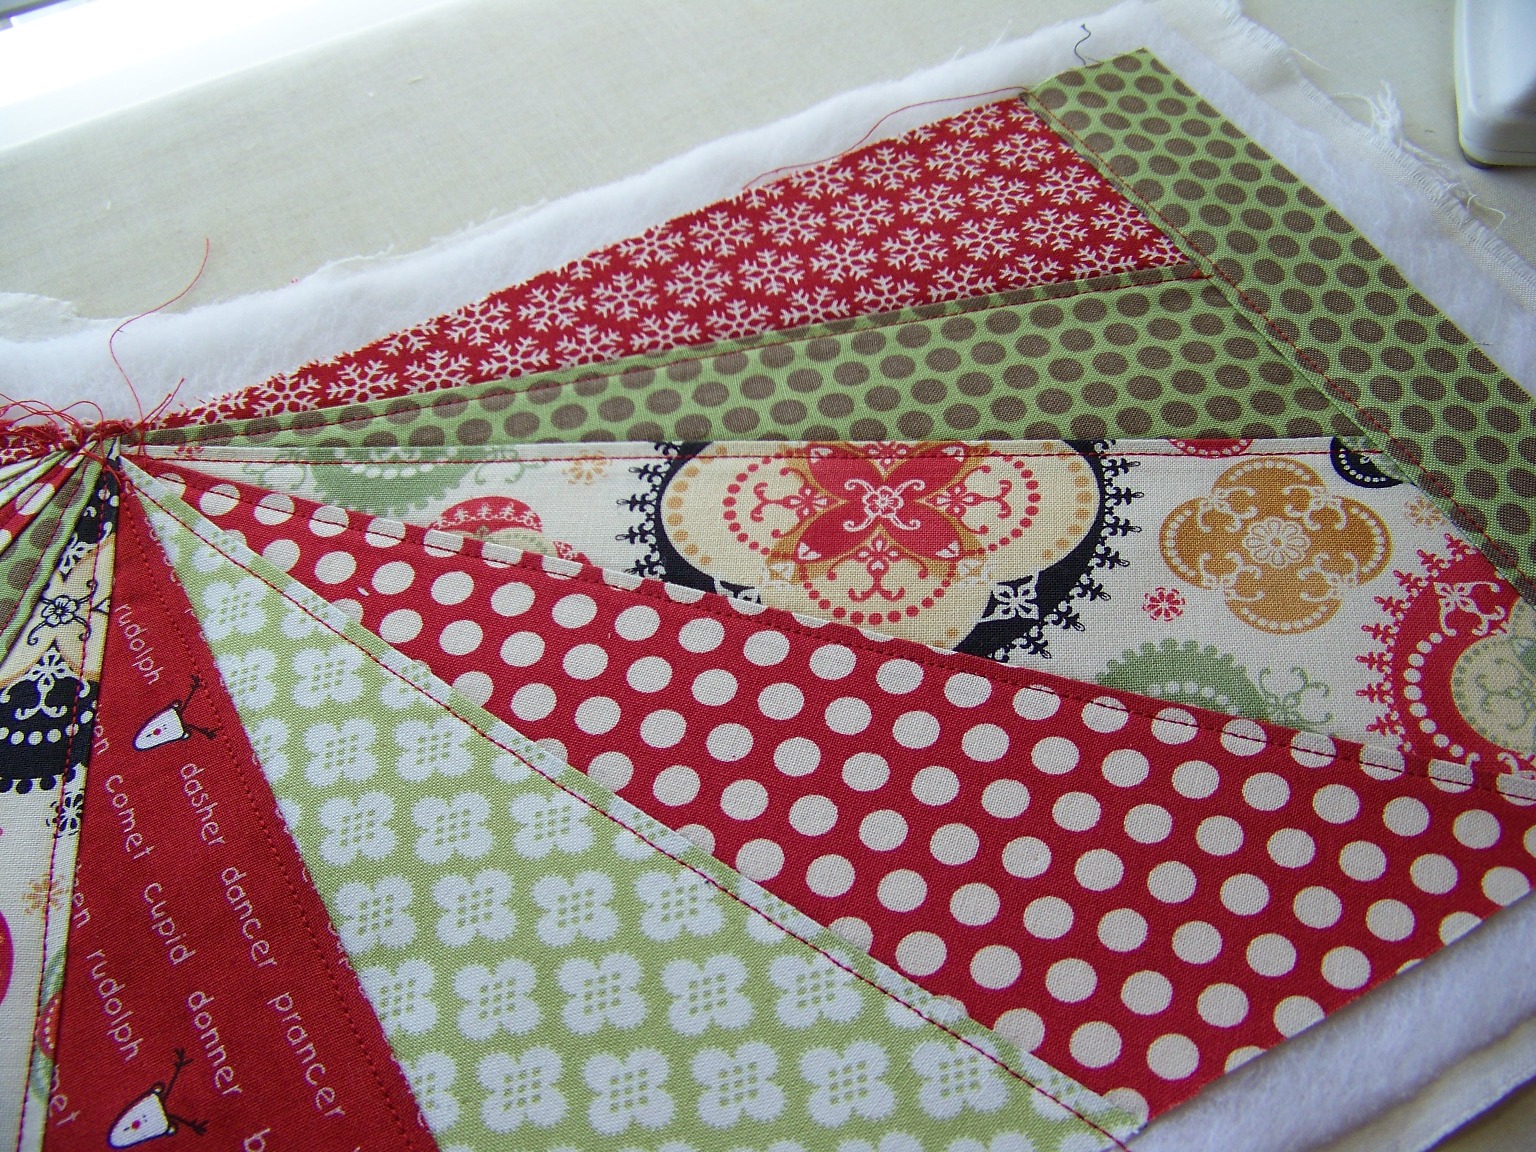
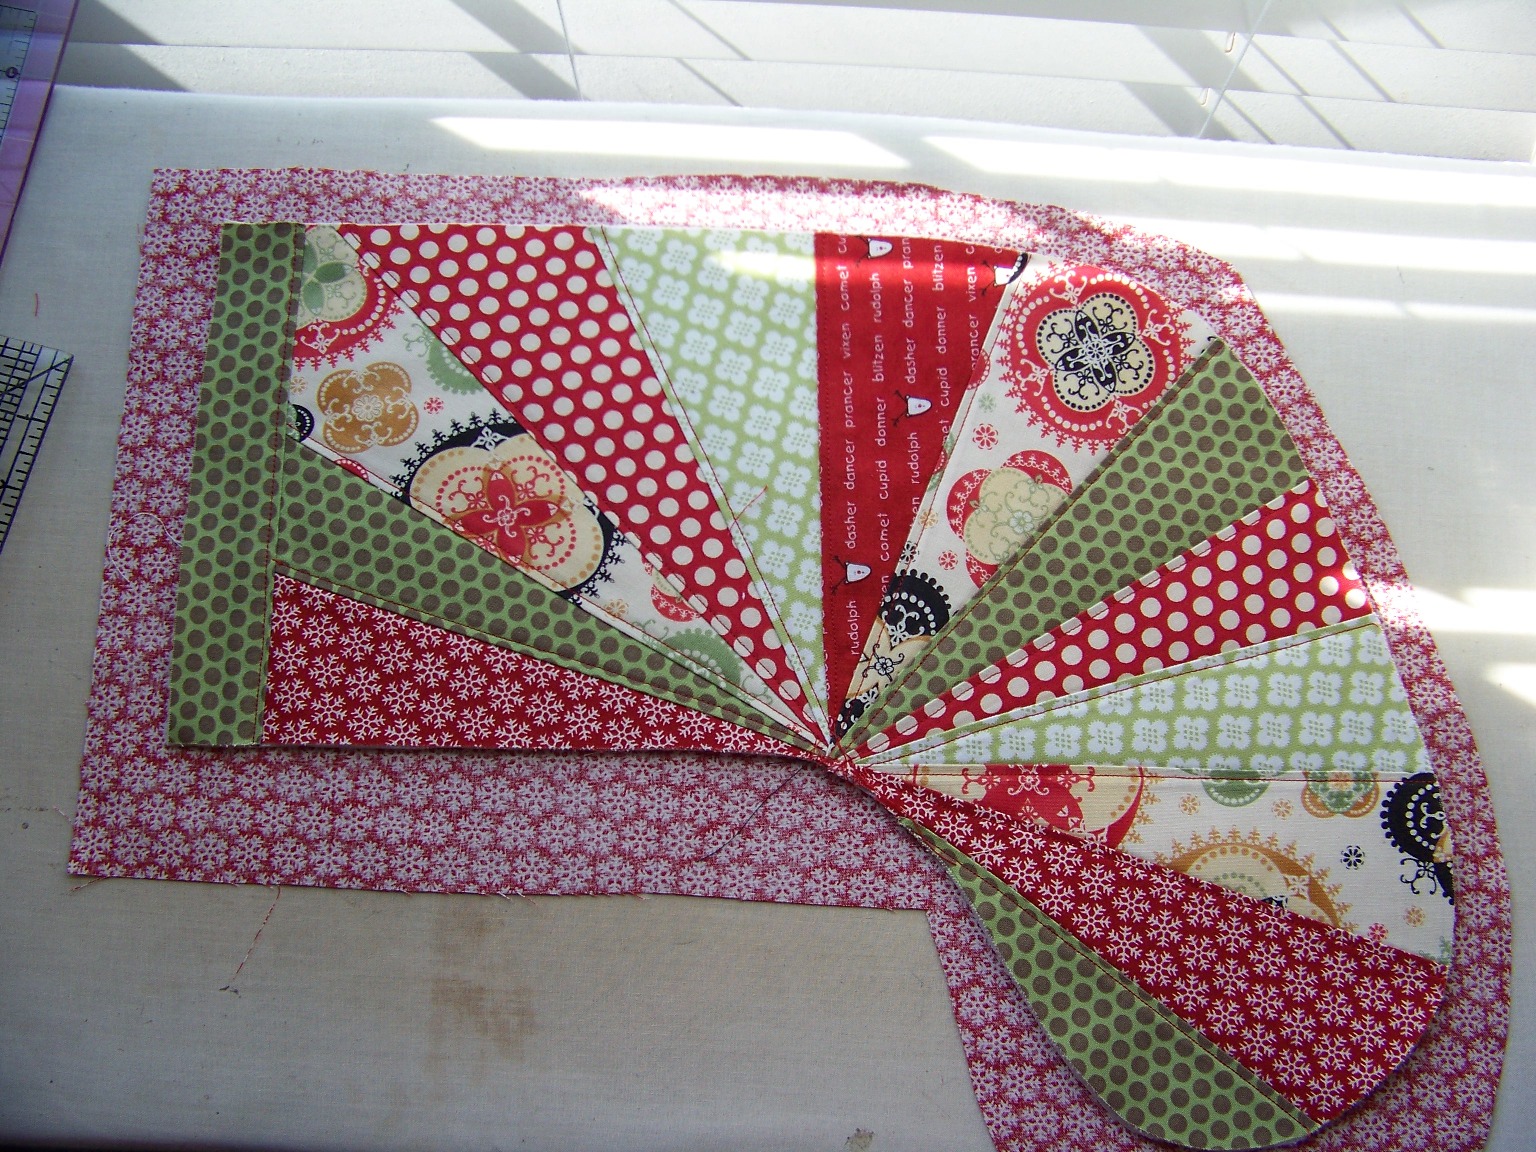
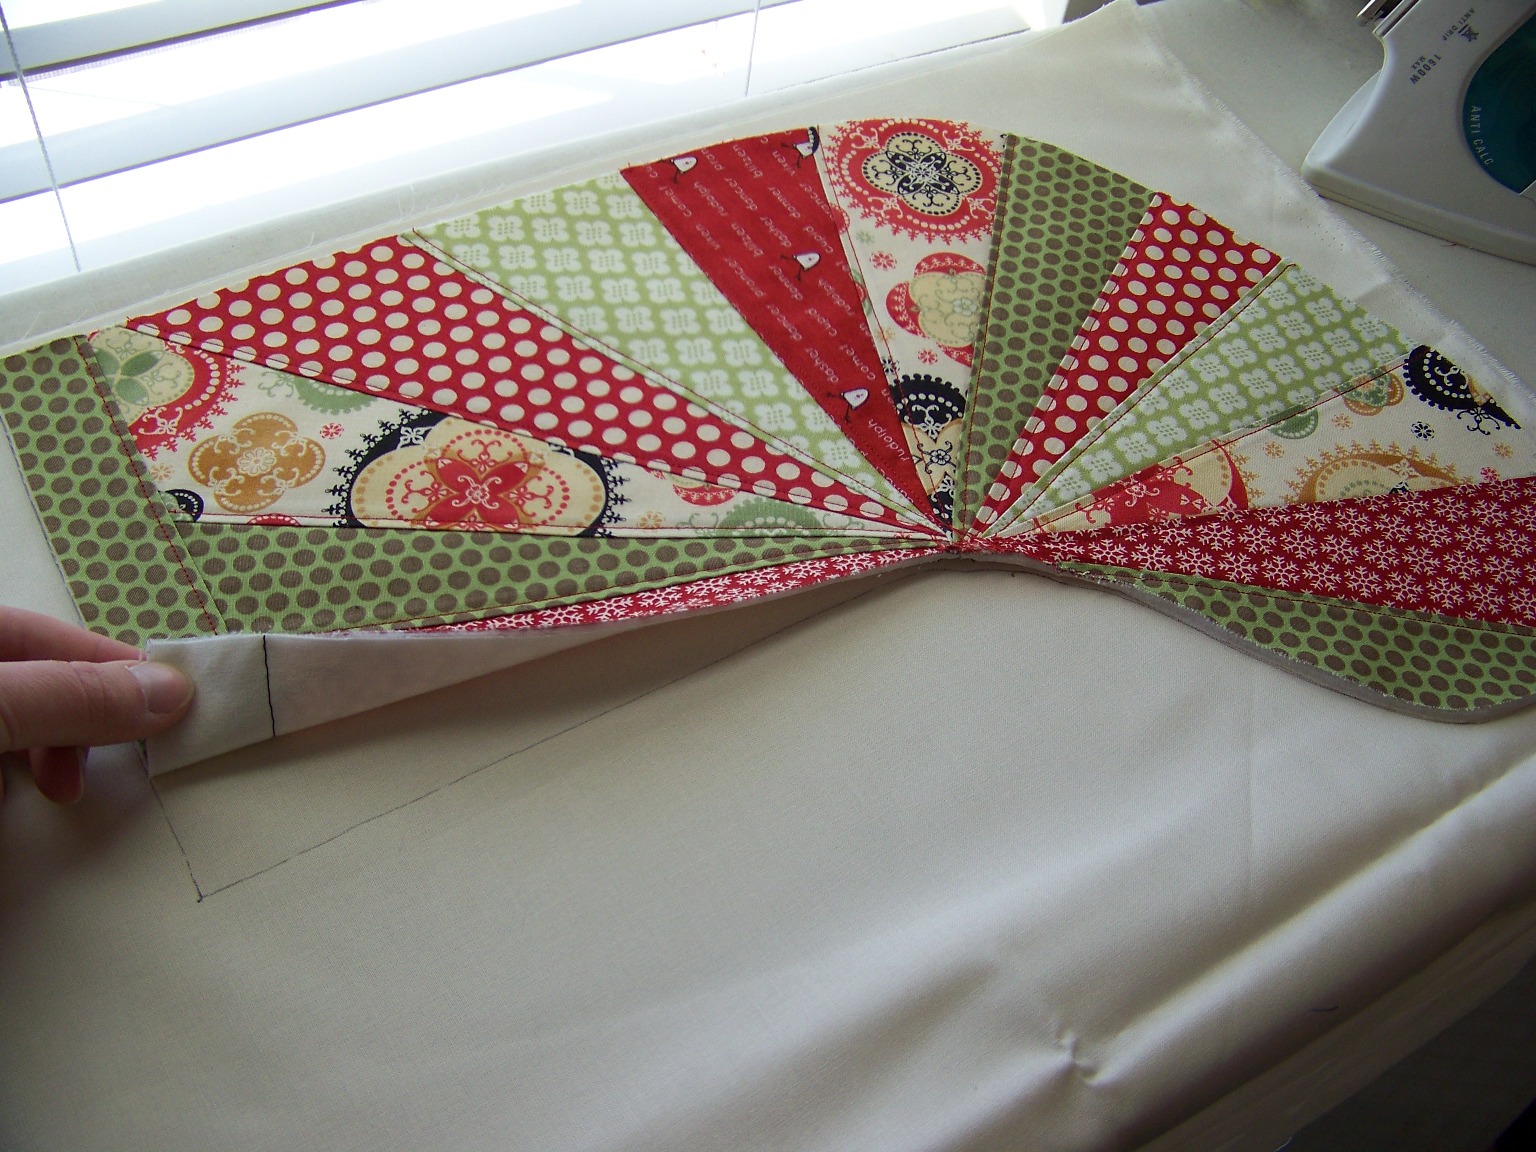
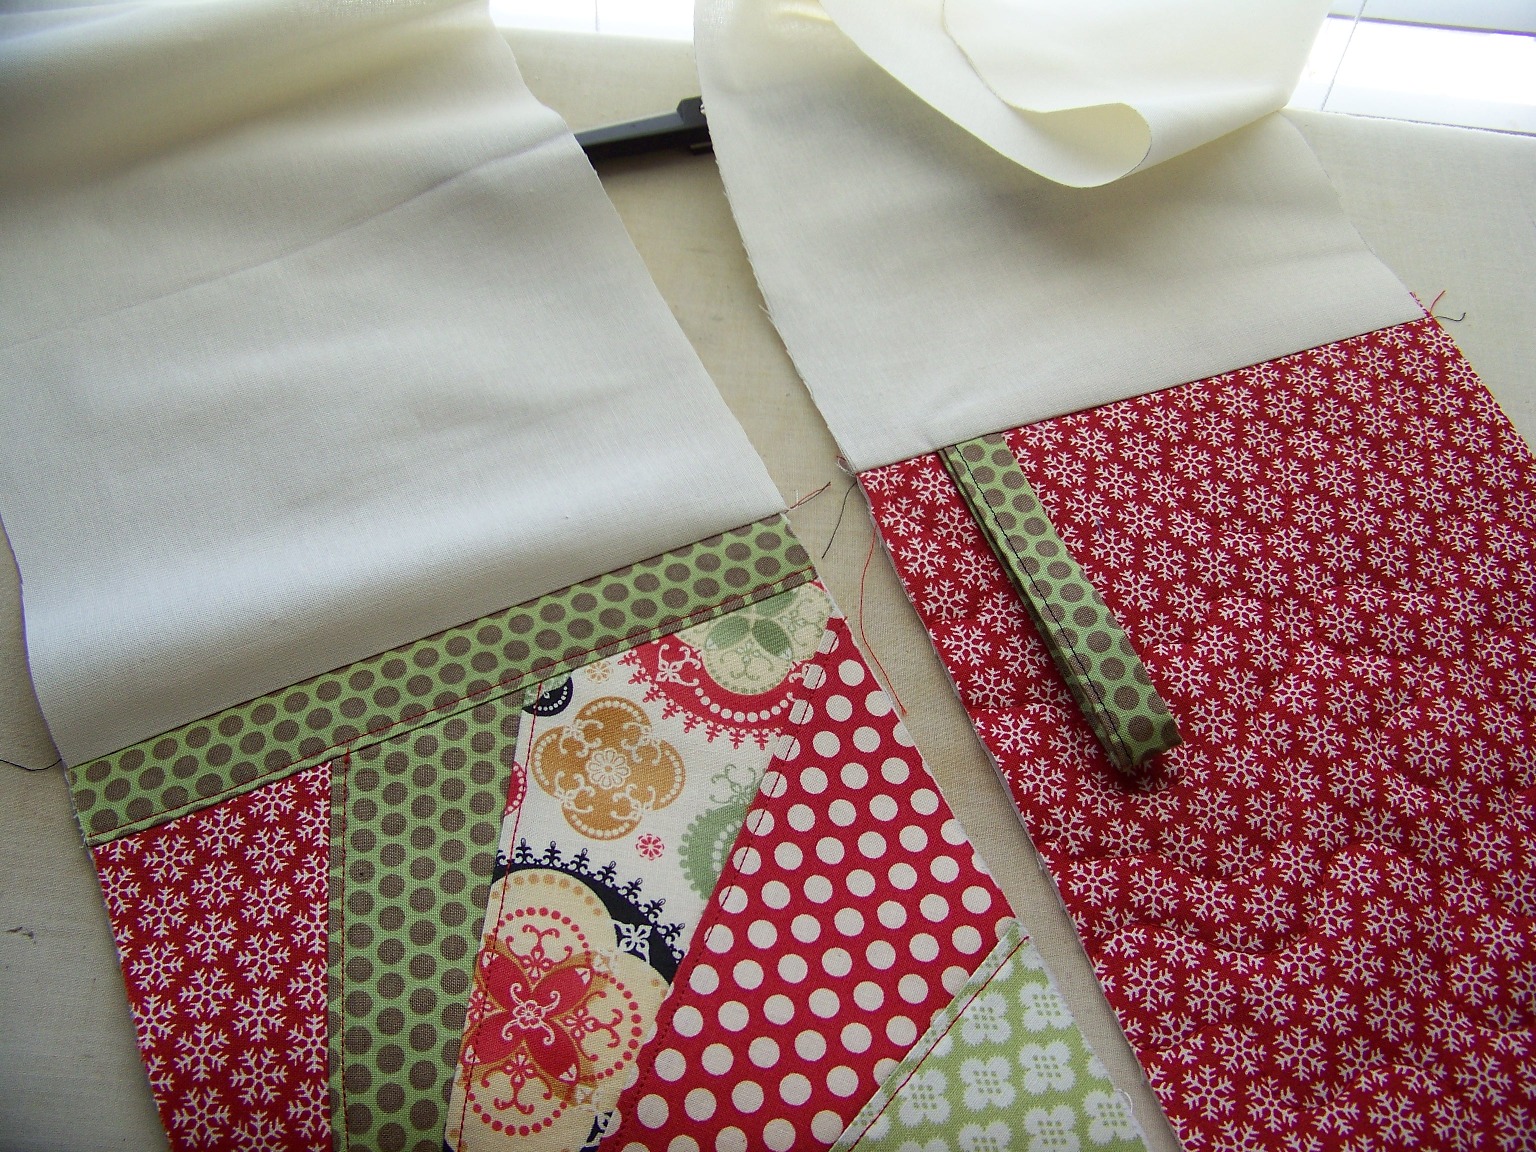
Lay another strip down and continue the process of adding to the spiral. Make sure your fabric will cover the template once it is stitched down.
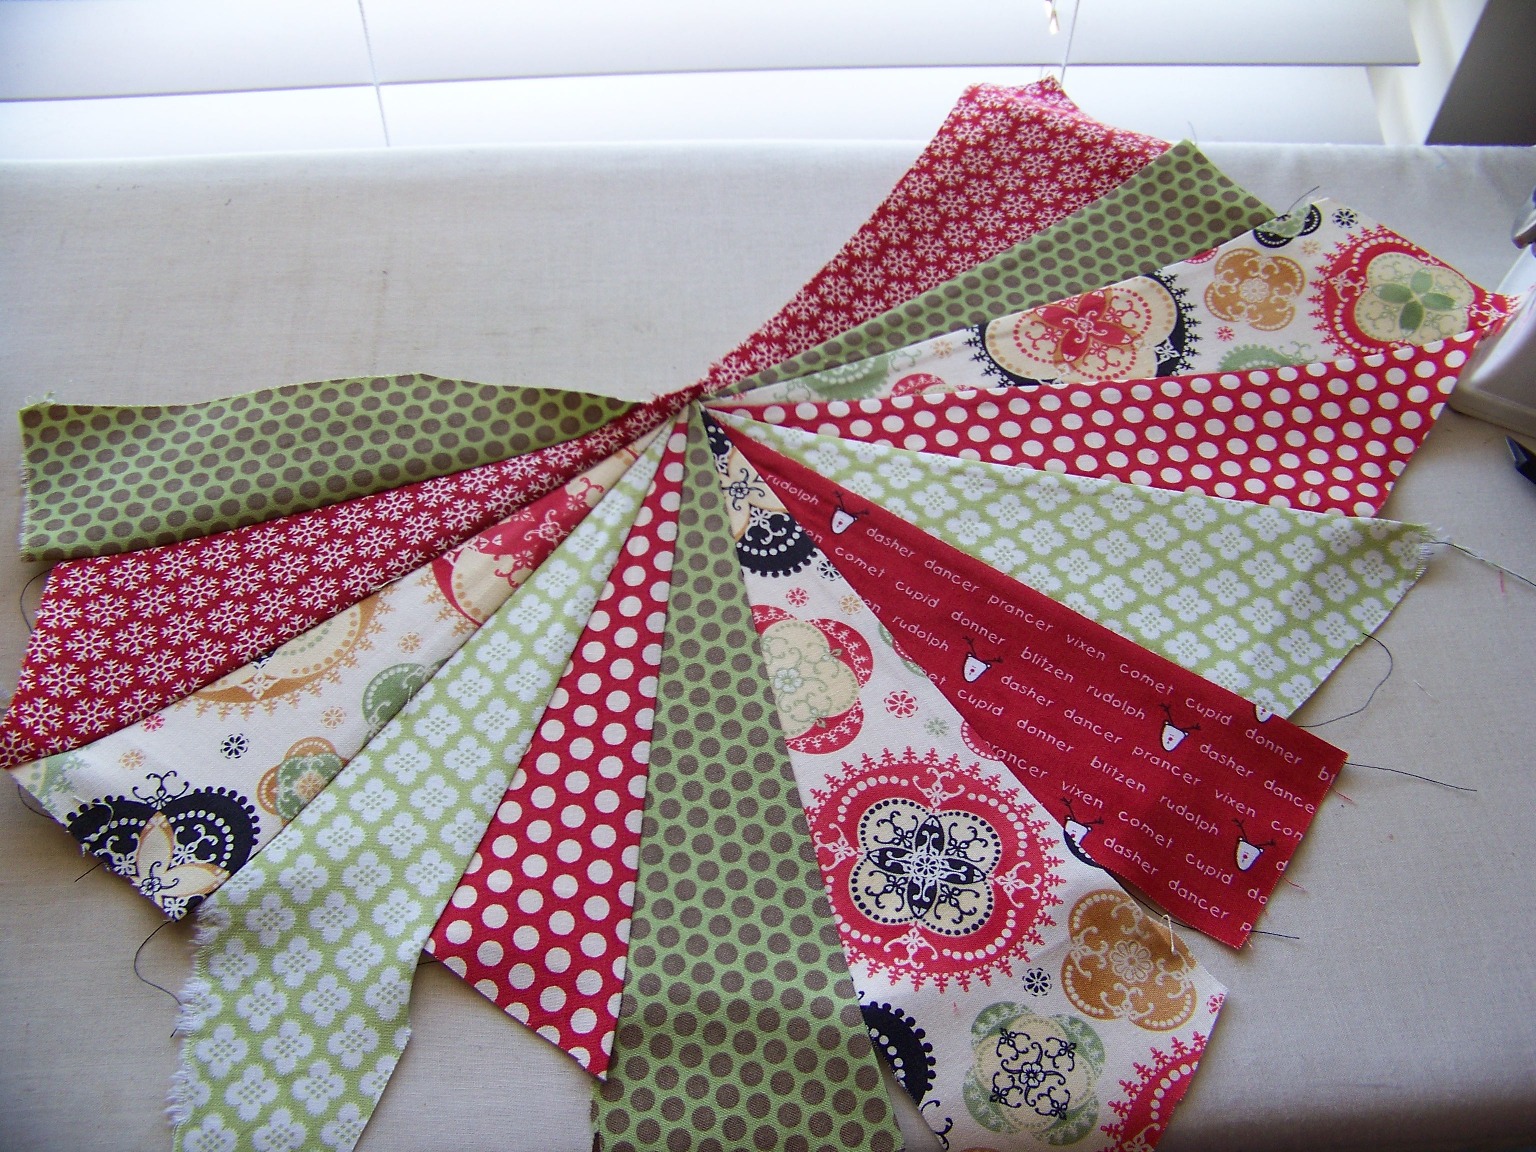
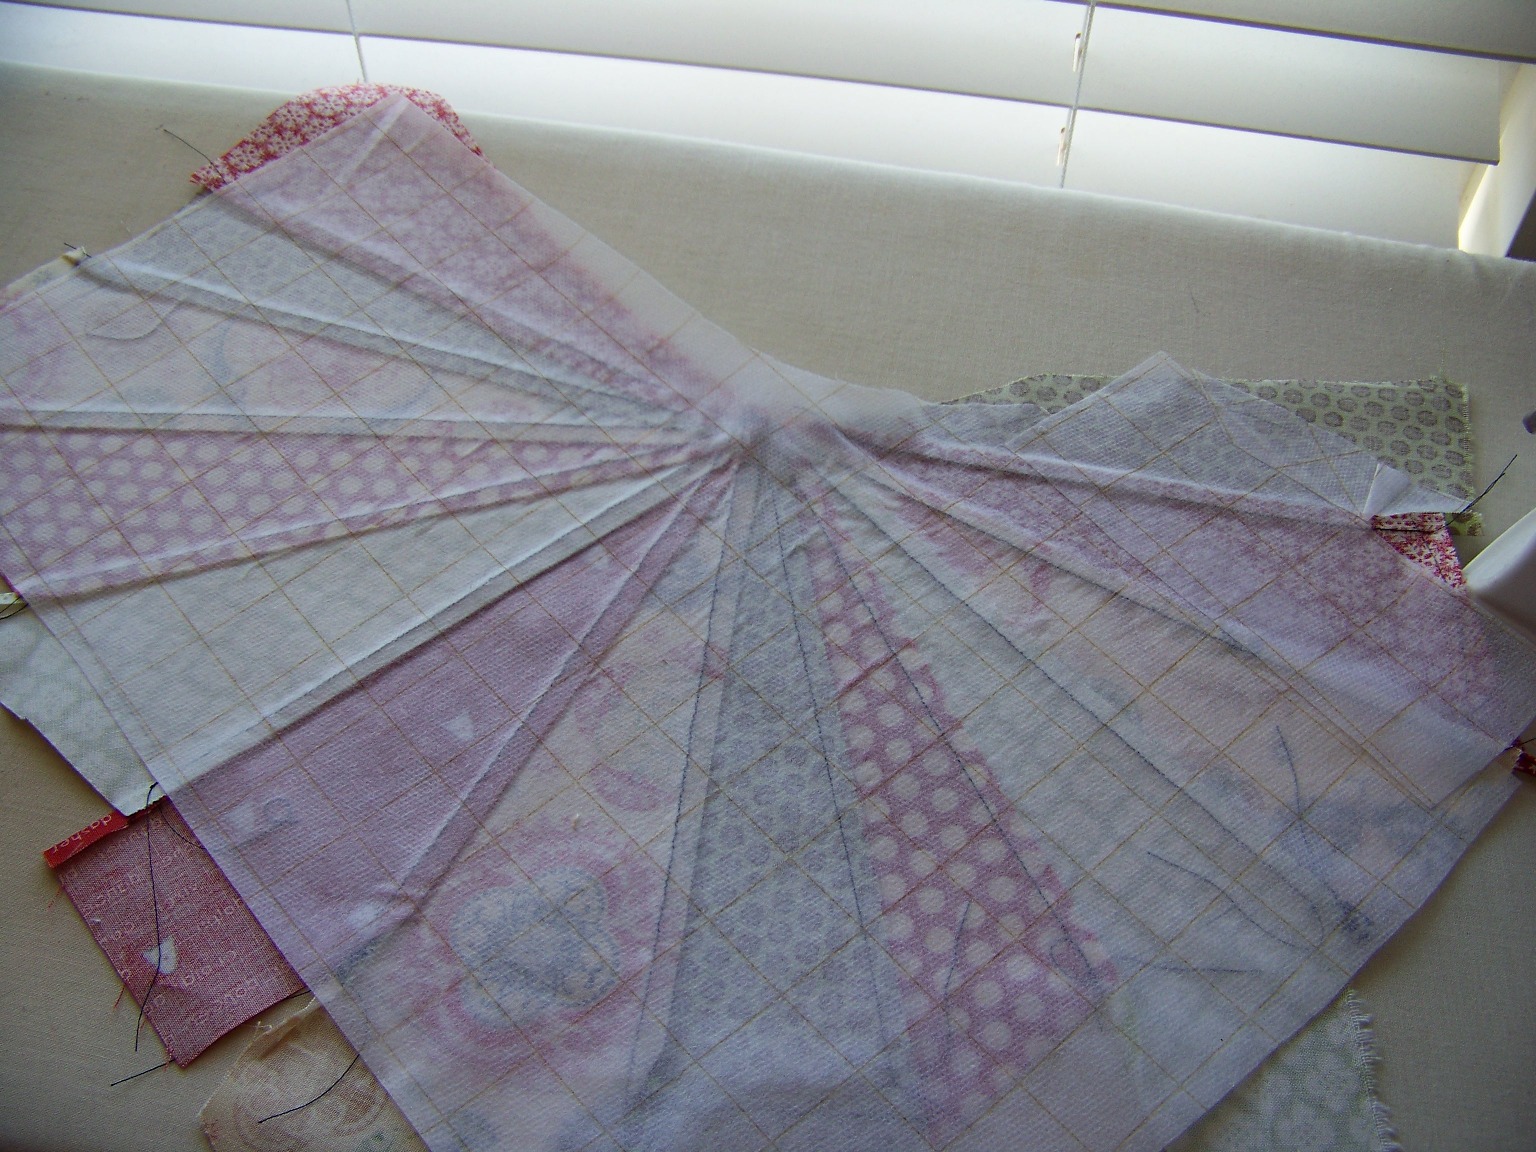
The back will look like this ...

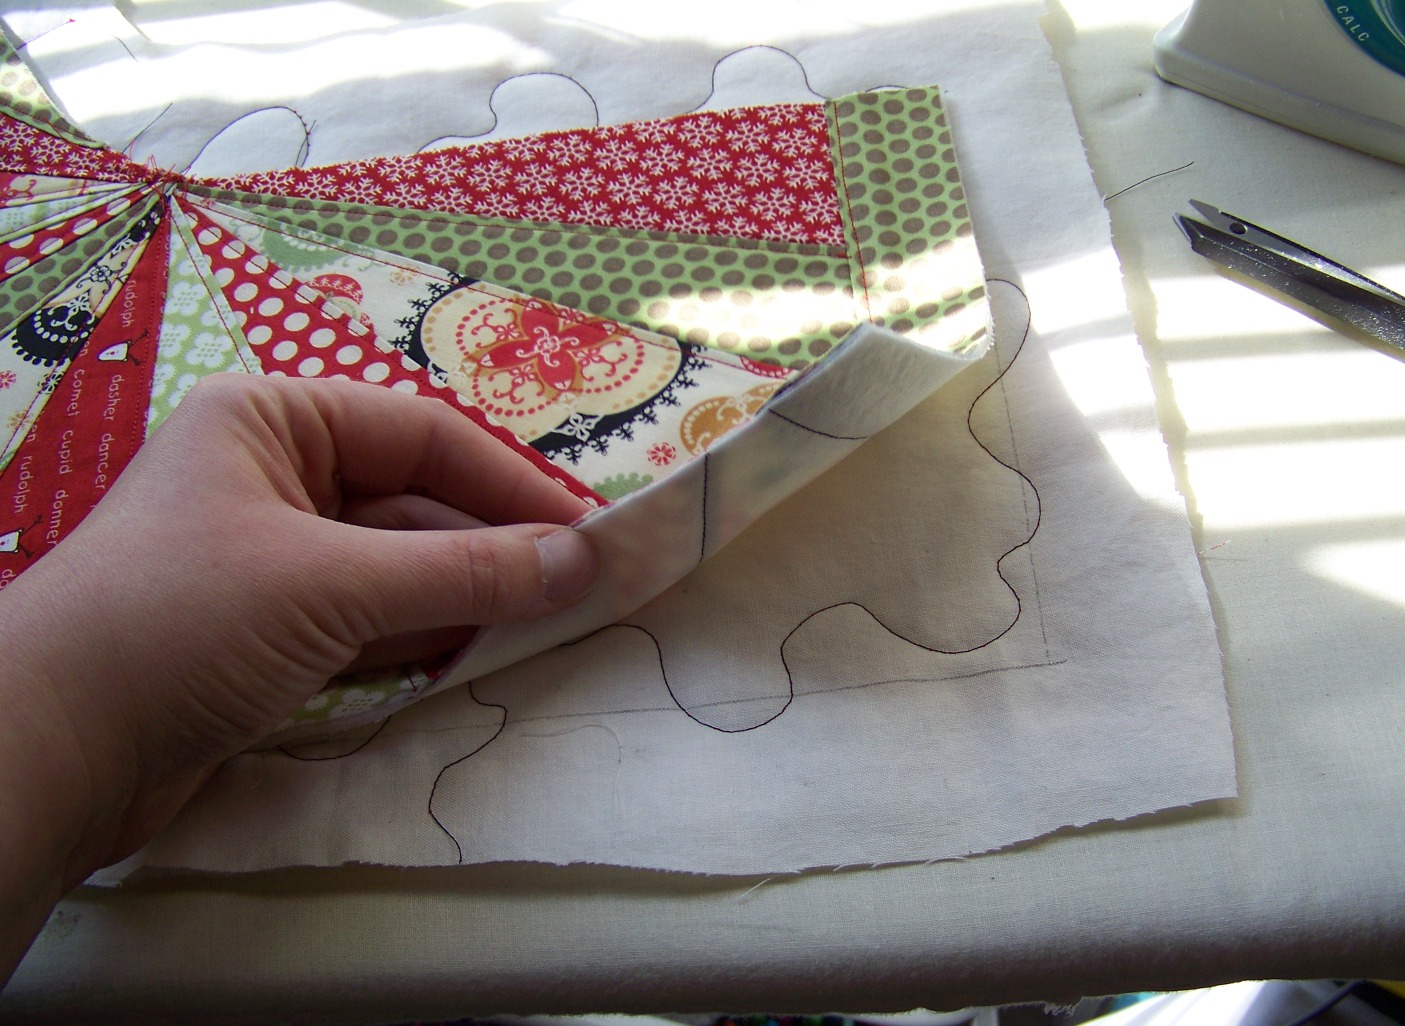
Step Four: Prepare the stocking front for finishing. Press your stocking carefully. Trace around the paper.
Next, very carefully remove the paper from the back of the stocking. Take your time so you don't pull out the stitches. :-)

Adhere a piece of lightweight fusible interfacing on the back of the pieced stocking. (This is personal preference, but I think it gives the stocking some extra body especially if you don't want to quilt it.)
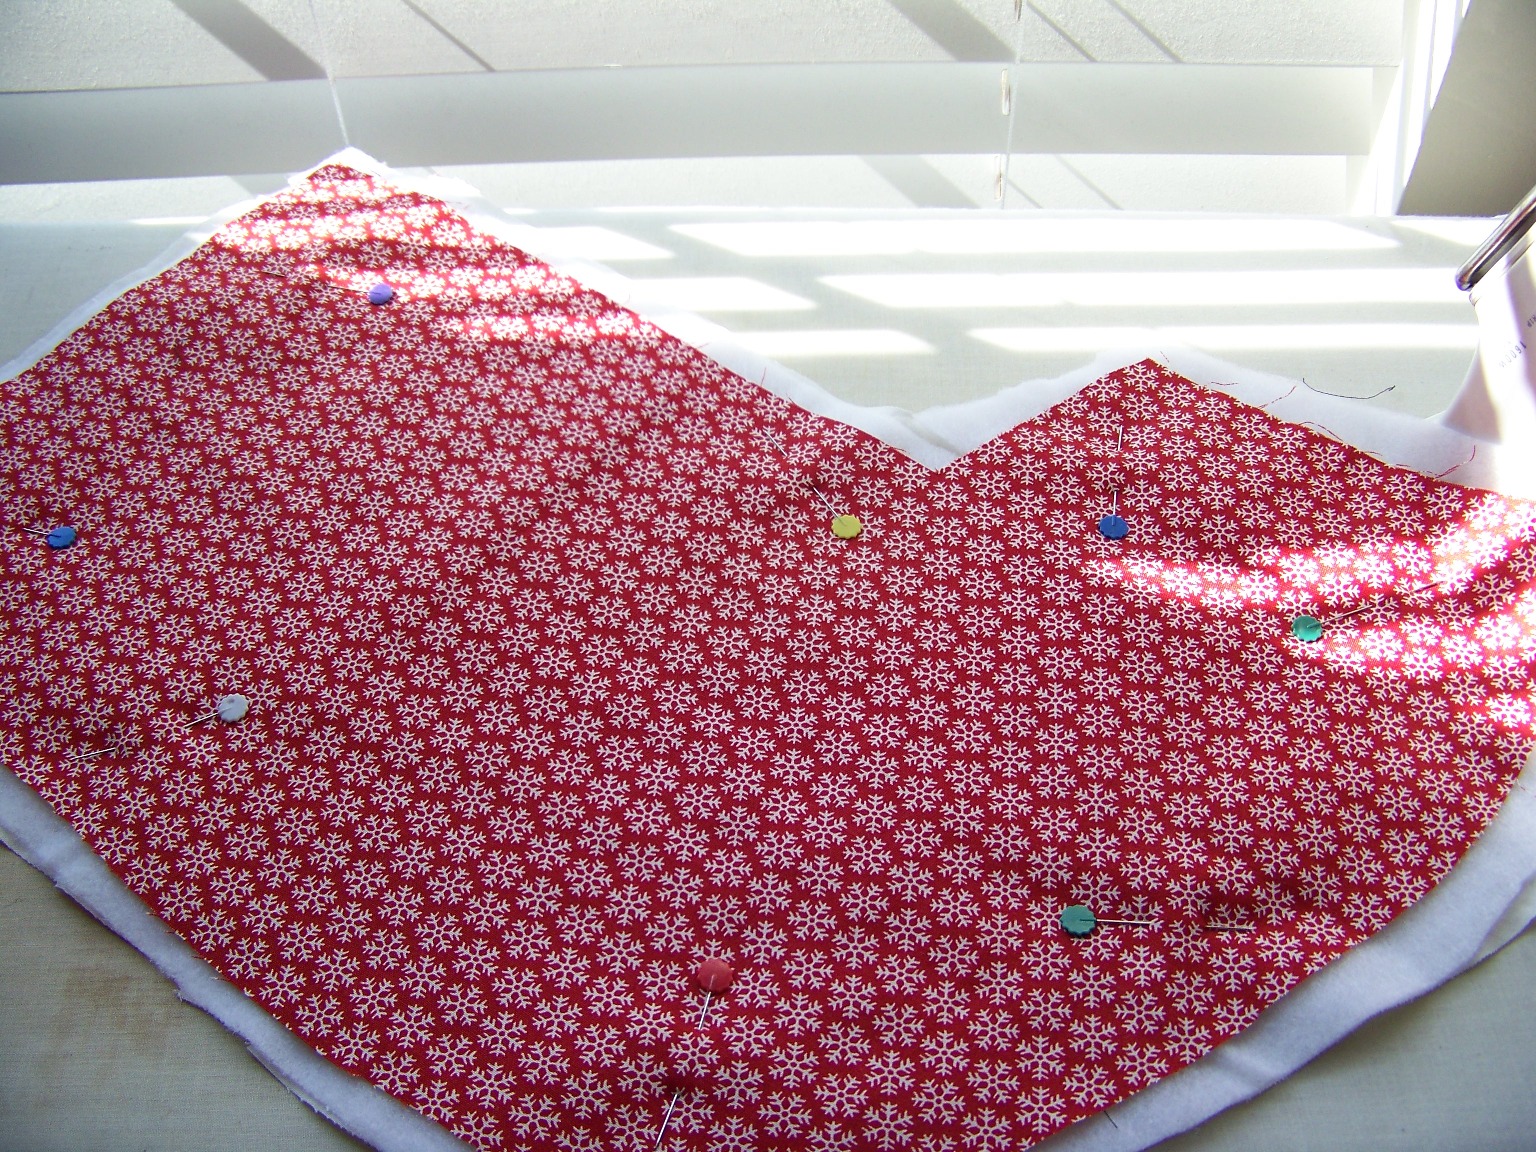
Cut out your stocking piece. Create a sandwich with the stocking top, a thin batting and a piece of solid and pin baste.

Quilt as desired. And trim.
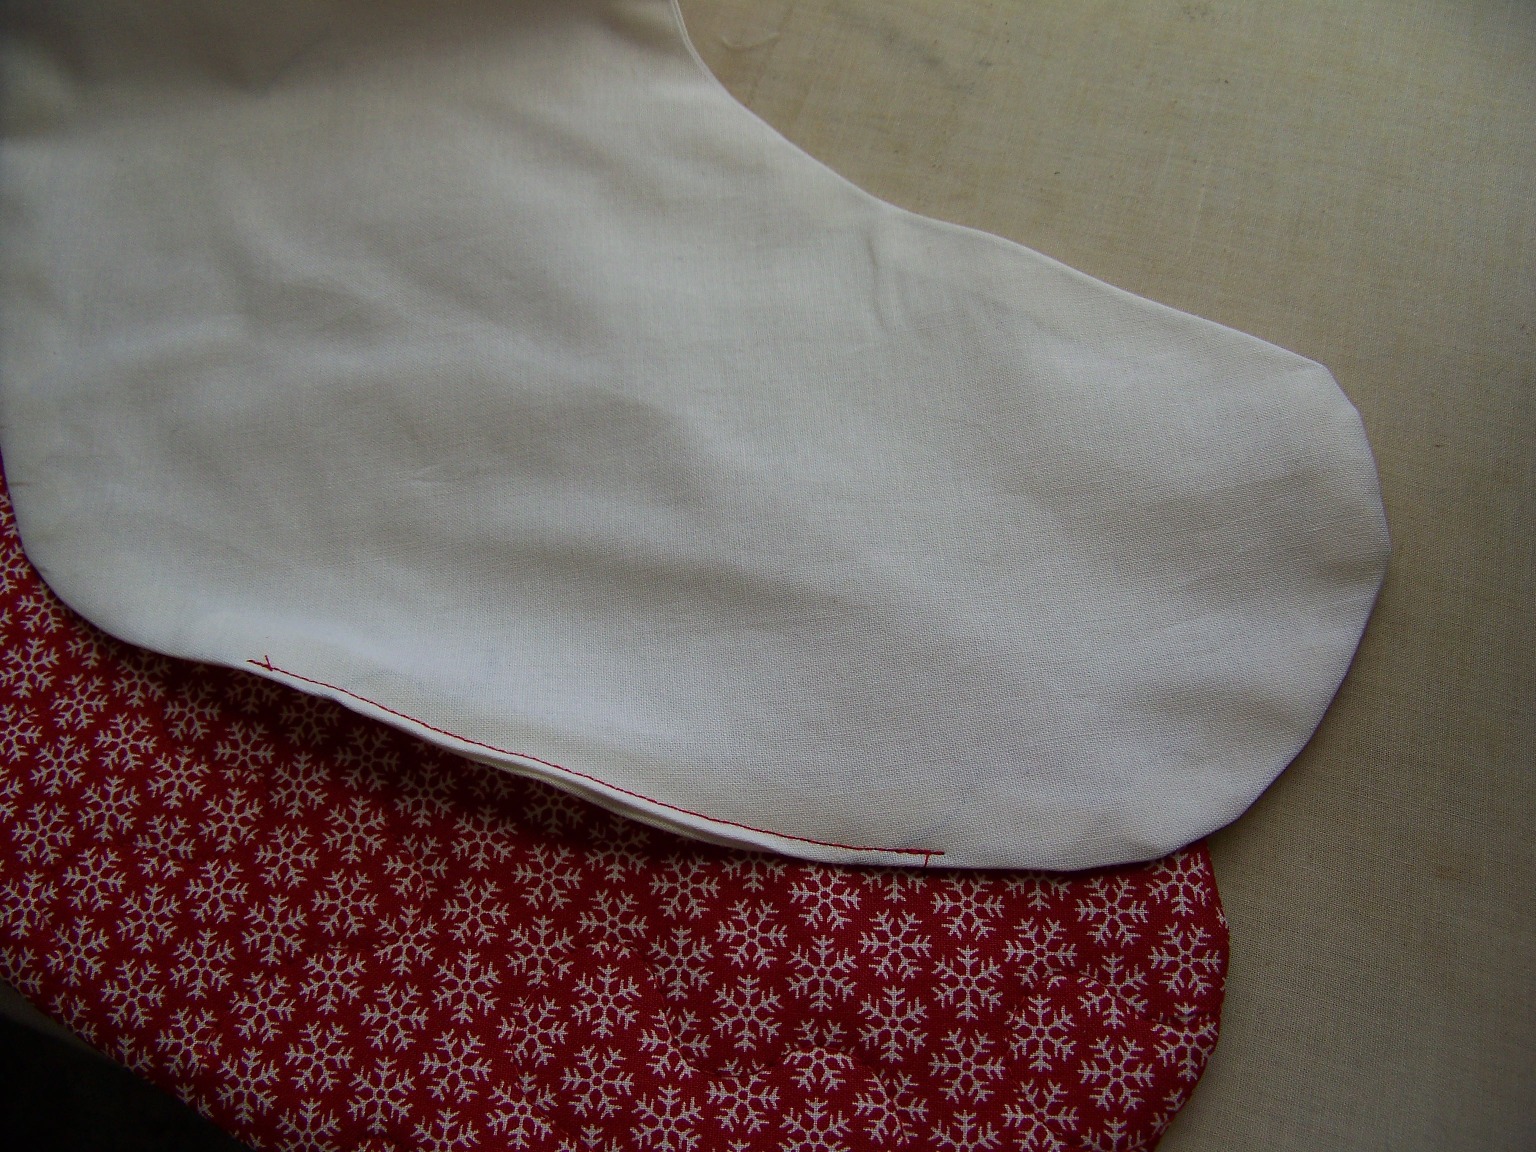
Step Five: Prepare the stocking back. Just in case your stocking may have ended up a little different from your original pattern, use the front as a template for your back and lining. Place stocking front on top of backing fabric WRONG sides together. Cut out a basic shape.
Sandwich backing, thin batting, and solid together and pin. Quilt as desired.
Put the stocking front on top of the quilted backing, again WRONG sides together, and trace the stocking front. The cut out the backing.
Step Six: Prepare the lining. Lay out a half yard of lining (I am using Bella Snow) keeping it folded. Trace the stocking front on the top layer of the lining.
Cut out both layers of the lining fabric.
Step Seven: Let's assemble your stocking! Make a hanging loop by taking a 2.5" wide fabric strip (mine was 2.5" wide by 9" long) and folding in half lengthwise. Fold edges in to the center fold line and stitch along edge. Attach the loop to the right side of the stocking back.
I attached mine about 1" from the edge, but next time I would probably do attach a little closer -1/2" or 5/8" from the edge. Alternatively, you could also use a piece of ribbon for your loop.
Lay a lining piece on top of the right sides of both the stocking front and stock back and pin. Stitch along the top edge.
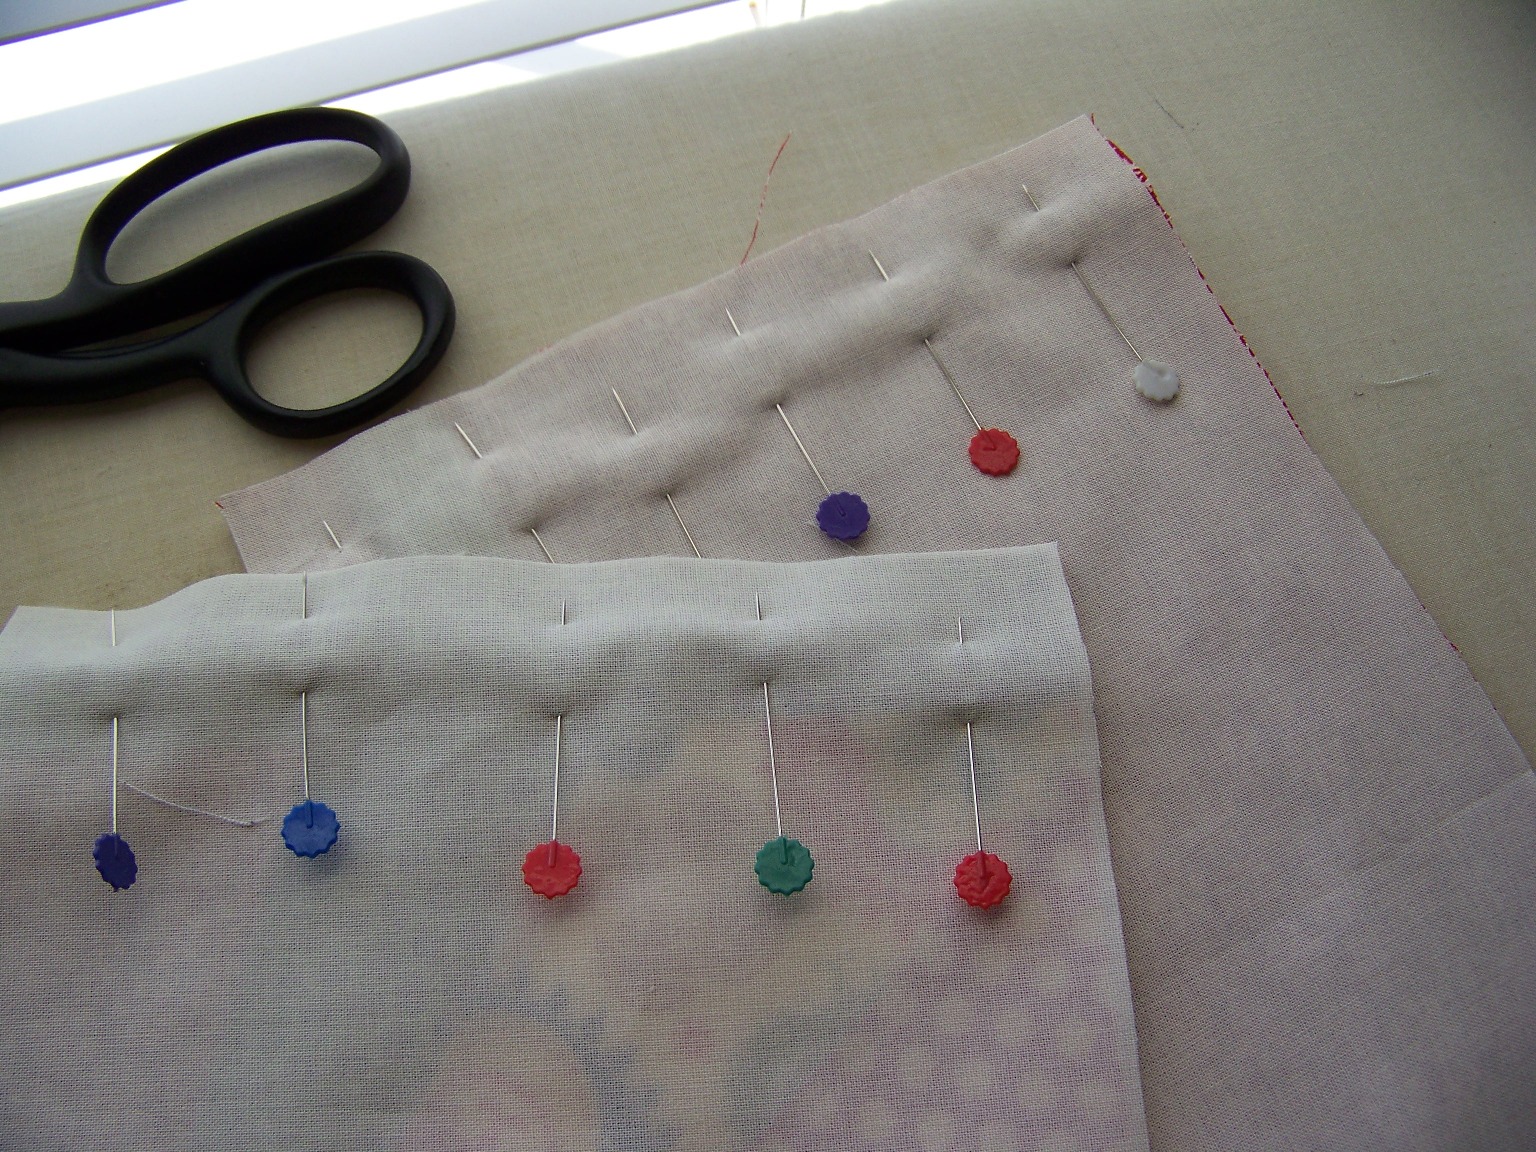
Press open so it looks like this...
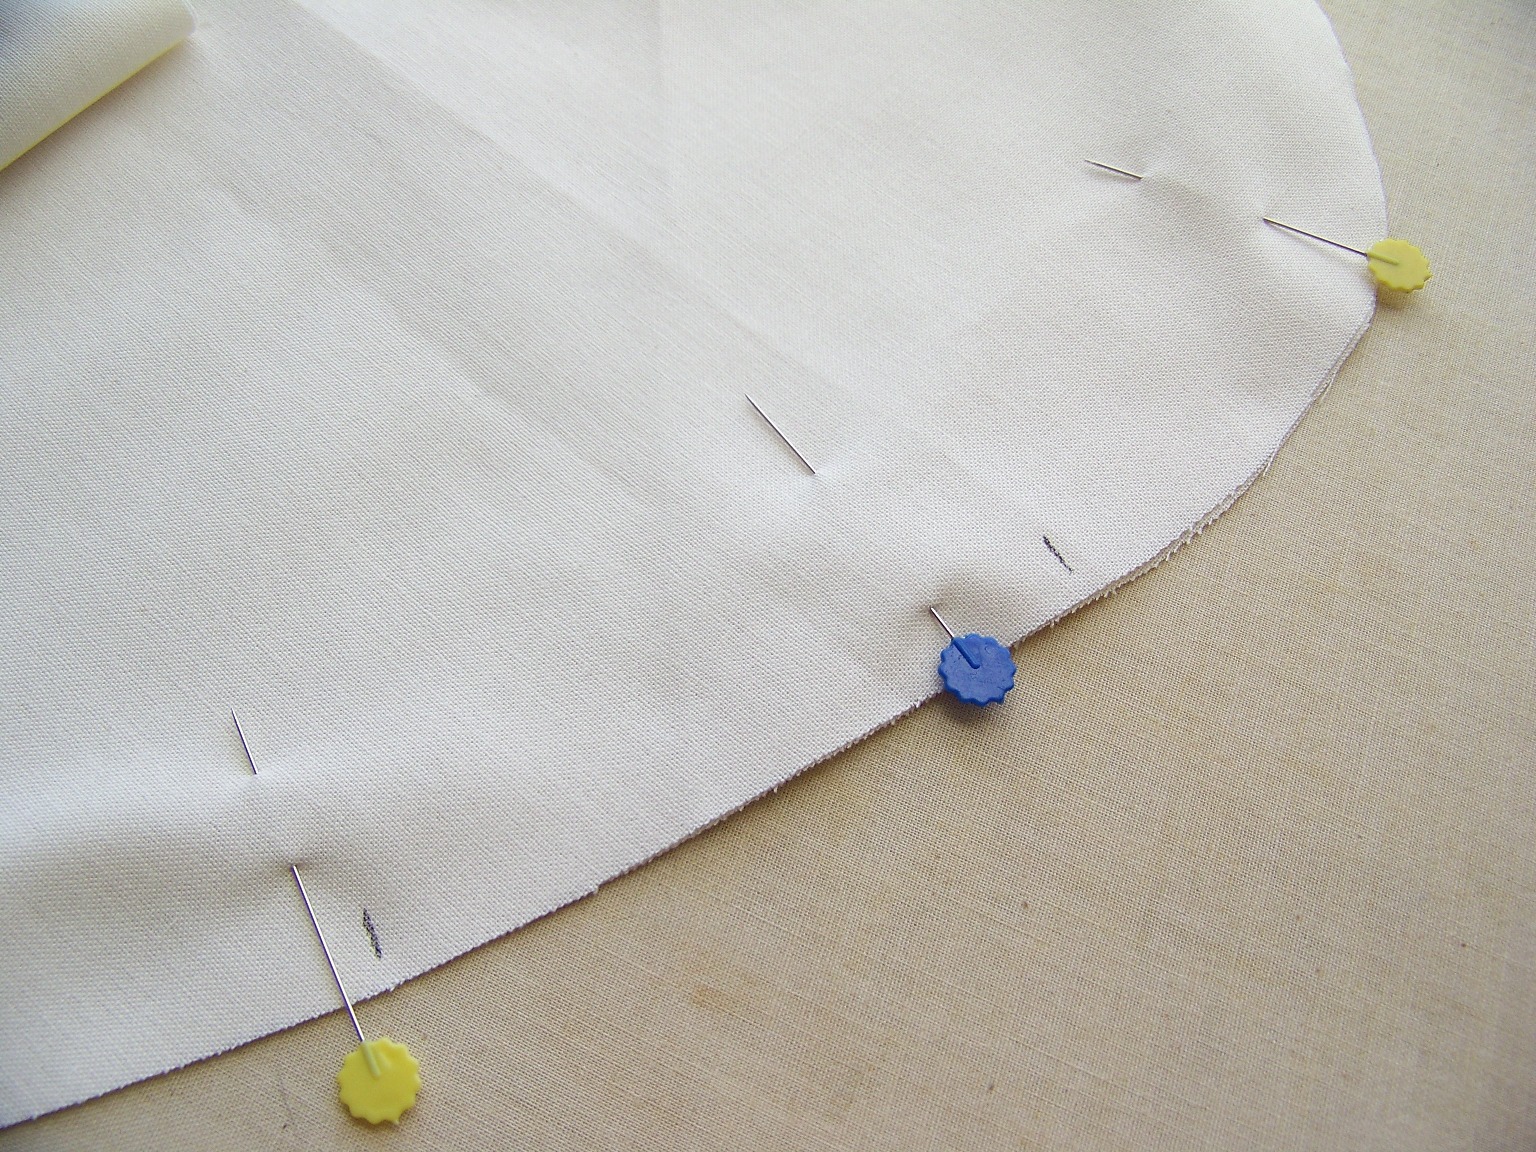
Lay stocking pieces RST and pin all the way around.

Be sure to line up the seams.
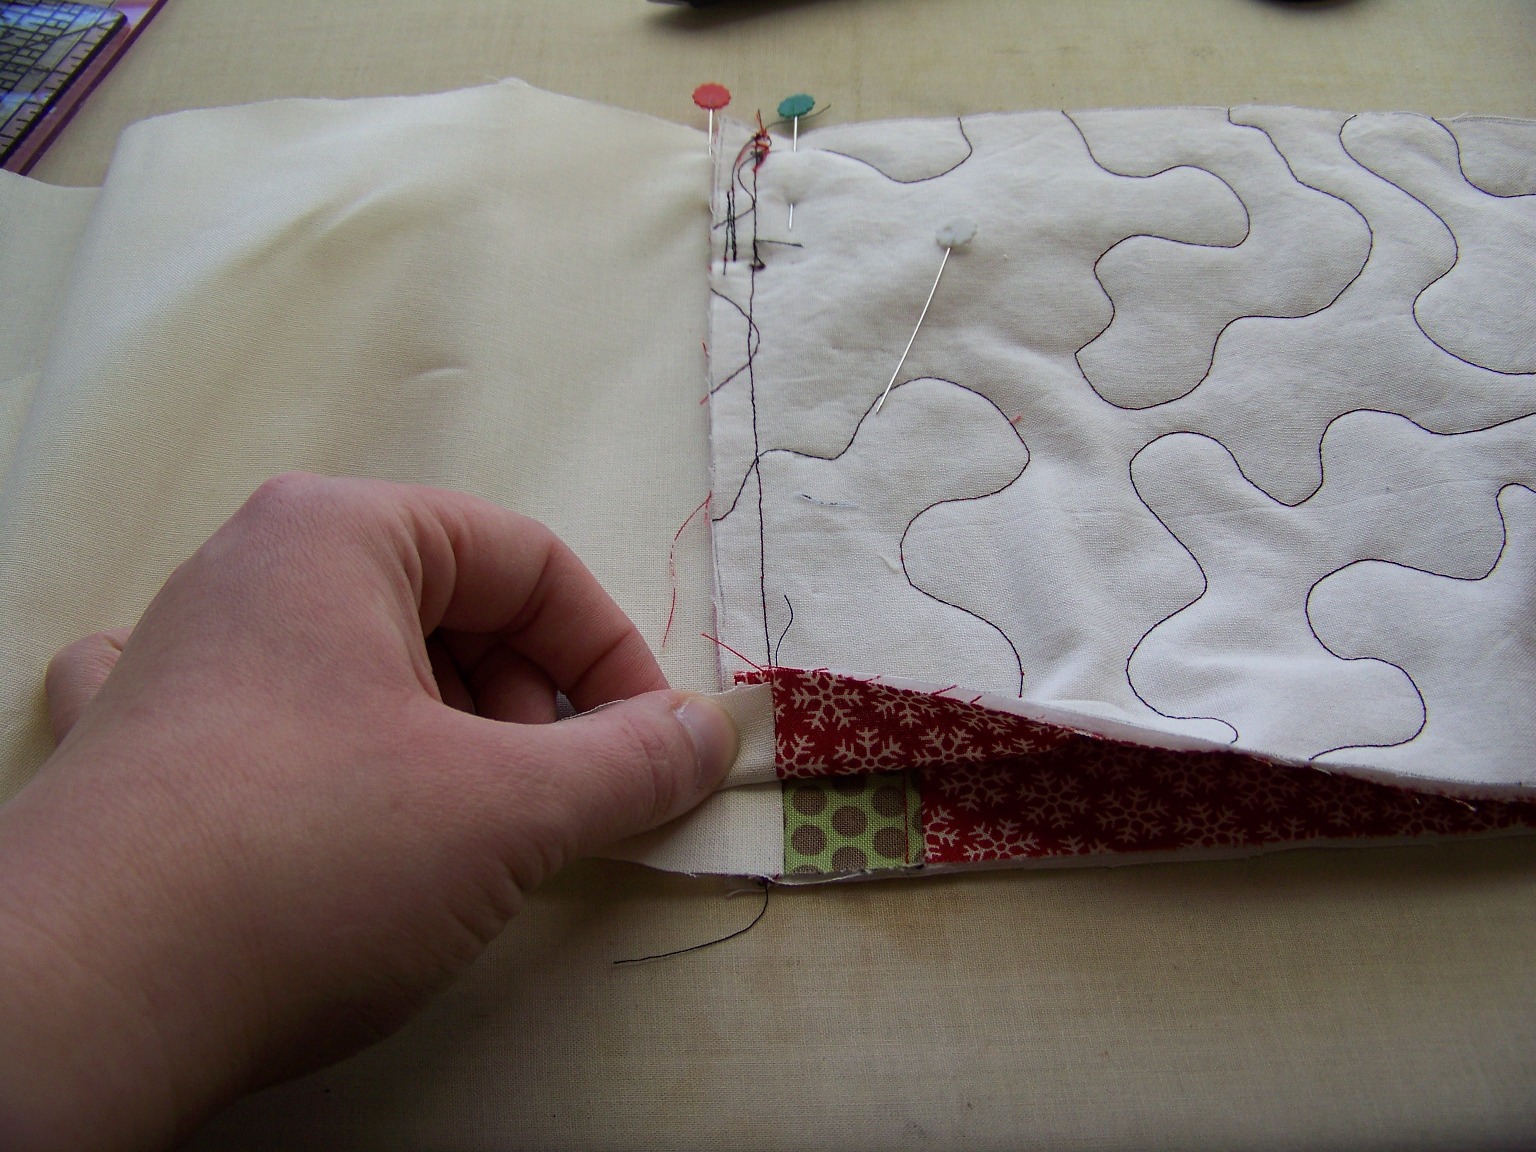
Mark a section on the lining to leave open. Mine was about a handwidth wide.
Stitch all the way around using about 3/8" inseam on the outer part of the stocking and a 1/2" inseam on the lining portion. Using a slightly larger inseam on the lining will help it fit inside the outer portion easily.
Next, clip/notch the seams on all the curves. Careful not to cut through the line you just stitched!

I forgot to also trim the lining portion seam down a little. My stocking turned out fine, but it would reduce some bulk if you do.
Turn your stocking right sides out and then stitch the opening closed. Stuff the lining back inside the outer portion of the stocking.
Carefully topstitch around the top edge of your stocking.

Press your stocking very well and enjoy!
I hope you liked this tutorial project. If you have any questions, please leave a comment or email me and I will do my best to clarify or add some additional photos to help explain something better.
A few things I'd like to note ...
- Use the pattern a template - make it bigger or taller or add a name band or a different piecing pattern.
- If you use this pattern or tutorial, I'd love to see your creation! Please send me a link and link back to my tutorial/pattern.
- Be sure you flip the pattern if needed so your finished stocking will hang in the direction you want it to.
- If you want a quilted look with less bulk, add the interfacing to both the front and a back piece and stitch as you would if you were quilting the stocking pieces. You will get a quilted look while adding some body to the stocking. Then assemble the stocking as above.
Again, I hope you enjoyed this tutorial!
Happy Sewing! :-)
Wonderful idea.
Thank you for this tutorial!! I have always used the “original” stockings for my kids. They are now vintage I suppose! My kids are now young adults and I’ve been thinking of new stockings!
Leave a comment