

Strawberry Social Drawstring Bag Sew Along - Piecing the Exterior
Hey there and welcome back!
Today, we're talking about piecing the exterior for this cute bag. A quick update to our last post - I had the lining measurement wrong for the small bag - it should be cut at 8.5" x 20" NOT 8.5" x 2" - I have updated the file and link (also below).
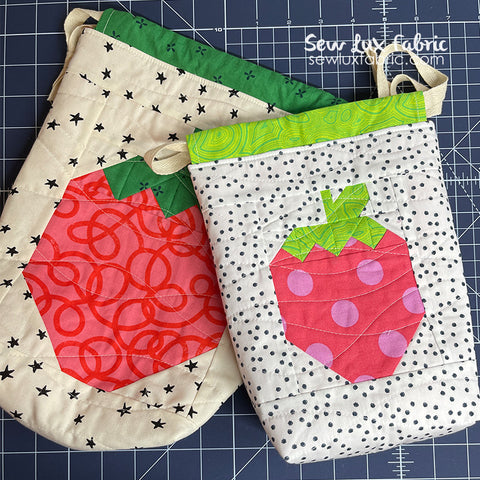
LINK UPDATED 5/27. I've included a handy PDF for cutting the exterior, lining & casing for both the large and small bags. You can see in the photo above that the mini block (right) is about 60% size of the original (left).
First up, you'll need to make a berry block following the directions in the Strawberry Social or Strawberry Social Mini block by The Pattern Basket.
Once you have a berry block, you'll add pieces to the right & left sides (Small: 2.5" x 6"; Large: 2.5" x 8.75").

Then, sew the top strip to the top (Small: 2" x 8.5"; Large 2" x 10.5").
And the large bottom section to the bottom (Small: 8.5" x 13"; Large 10.5" x 15.5").

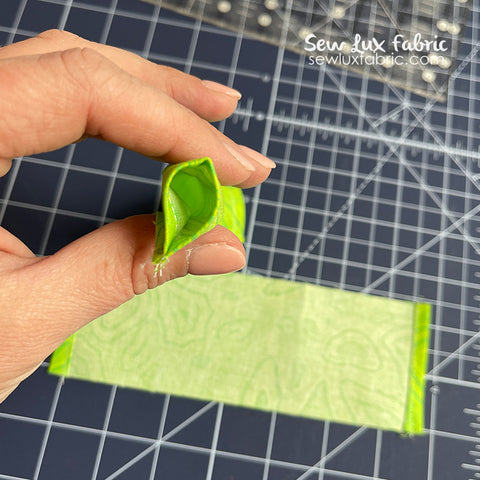
For the casing strips, fold each short end under about 1/2" and then fold the raw edge into the fold and press. Top stitch to secure in place.

Fold in half lengthwise with wrong sides together and baste in place with a 1/8" seam to make a tube. Make two tubes.
You're all set for quilting & assembly!

Make your berry block & share a picture and tag us on IG @sewlux with #strawberrysocialbag so we can check out your bag progress!
See you on Friday for our last post in the series, where we will quilt & assemble the bag.
Happy Sewing!
Leave a comment